blogsHomeHeroBanner

తాజా కథనాలు

Image

How to Control Weeds Effectively After First Monsoon Rain

Manan Sharma

-

27 May 2026

Introduction The first monsoon rain brings relief to farmers and helps start sowing operations for many crops. However, along with crop germination, weeds also emerge very quickly after rainfall. In many fields, weed growth becomes visible within a few days after the first rain. If weeds are not controlled early, they compete strongly with crops for nutrients, water, sunlight, and space. During the early crop stage, weeds can reduce germination, slow crop growth, weaken root development, and lower final yield. In some crops, uncontrolled weeds during the first 30–40 days may cause major production loss. Therefore, proper weed management immediately after monsoon rain is very important for healthy crop establishment. Farmers should combine manual methods, herbicide application, field monitoring, and timely operations for effective weed control. Why Weed Growth Increases After First Rain Weed seeds remain dormant in the soil during dry periods. Once rainfall moistens the soil, these seeds germinate rapidly. Warm temperature, moisture, and sunlight together create ideal conditions for weed emergence. Weeds usually grow faster than crop seedlings during the initial stage. If not controlled early, they dominate the field and reduce crop growth. Common problems caused by weeds include: Competition for nutrients and water Reduced crop growth Weak root development Poor tillering and branching Increased pest and disease problems Difficulty during fertilizer application and irrigation Lower yield and poor crop quality Early weed management is always easier and cheaper than controlling large weeds later. Common Types of Weeds Seen After Monsoon Rain Farmers may observe different types of weeds depending on crop and soil condition. Grassy Weeds These weeds resemble grasses and spread rapidly in rainy weather. Examples include: Echinochloa species Cynodon species Dactyloctenium species Broadleaf Weeds These weeds have broad leaves and compete heavily with crops. Examples include: Amaranthus species Parthenium Commelina species Sedges These weeds are commonly seen in wet and poorly drained soils. Examples include: Cyperus species Identifying the weed type is important before selecting any herbicide. Importance of Early Weed Control The first 30–45 days after sowing are called the critical crop-weed competition period in many crops. During this stage, weeds affect crop establishment the most. If weeds are controlled early: Crop seedlings establish properly Nutrient use efficiency improves Water availability increases for the crop Plant growth becomes uniform Pest hiding places reduce Future weed pressure becomes lower Delayed weed control increases labor cost and reduces herbicide effectiveness. Pre-Emergence Herbicides Pre-emergence herbicides are applied soon after sowing but before weed emergence. These herbicides form a protective layer on the soil surface and stop weed seeds from germinating properly. Advantages of Pre-Emergence Herbicides Control weeds during the early crop stage Reduce initial weed competition Lower labor requirement Help maintain clean crop rows Reduce need for repeated weeding Important Conditions for Better Results Farmers should remember: Soil should have sufficient moisture Spray should be done soon after sowing Herbicide should be applied before weeds emerge Field should be free from large soil clods Proper spray coverage is necessary If heavy rainfall occurs immediately after spraying, herbicide movement may become uneven. Therefore, weather observation is important. Post-Emergence Herbicides Post-emergence herbicides are sprayed after weeds emerge in the field. These herbicides work better when weeds are young and actively growing. Best Timing for Post-Emergence Spray Farmers should spray: When weeds are at early growth stage Before weeds become too large During active weed growth When rainfall is not expected immediately after spraying Young weeds are easier to control compared to mature weeds. Important Points Before Spraying Identify whether weeds are grassy or broadleaf Select crop-safe herbicides only Avoid spraying during strong wind Use recommended dosage Do not spray stressed crops Late spraying on overgrown weeds may not give satisfactory control. Crop-Wise Weed Management Recommendations Different crops require different weed management approaches. Farmers should follow crop-specific recommendations. Cotton In cotton, early weed competition reduces plant growth and branching. Farmers should: Use pre-emergence herbicide soon after sowing Follow intercultivation after weed emergence Remove weeds near plant base manually if needed Maize Weeds reduce nutrient uptake heavily in maize during the early stage. Important practices include: Early pre-emergence spray Timely post-emergence control for grassy weeds Mechanical weeding between rows Soybean Soybean seedlings grow slowly initially and are highly affected by weeds. Farmers should: Maintain weed-free field during first 40 days Use suitable pre-emergence herbicide Monitor broadleaf weed infestation carefully Paddy Weeds in paddy compete strongly for nutrients and space. Management includes: Proper water management Timely herbicide application Hand weeding where necessary Vegetable Crops Vegetable crops require careful herbicide selection because young seedlings are sensitive. Farmers should: Prefer mulching and manual weeding where possible Use only crop-recommended herbicides Avoid chemical drift on tender plants Manual vs Chemical Weed Control Both manual and chemical weed management methods have advantages. Farmers should choose based on crop stage, labor availability, rainfall condition, and weed intensity. Manual Weed Control Includes: Hand weeding Hoeing Intercultivation Advantages: Safe for crop plants Useful for small fields Effective for isolated weeds Limitations: High labor cost Difficult during continuous rain Time-consuming in large fields Chemical Weed Control Includes herbicide spraying. Advantages: Faster weed control Saves labor and time Effective for large fields Limitations: Wrong herbicide may damage crops Improper spraying reduces effectiveness Requires correct timing and dosage Integrated weed management using both methods often gives the best results. Spray Precautions During Rainy Weather Herbicide spraying during monsoon requires extra care because rainfall affects spray performance. Farmers should follow these precautions: Avoid spraying when heavy rain is expected Do not spray during strong wind Spray when leaves are dry Use clean water for spray preparation Maintain proper spray pressure Use recommended nozzle type Avoid spray drift to nearby crops Follow label recommendations carefully If rain occurs immediately after spraying, herbicide effectiveness may reduce. In some cases, re-spraying may be needed based on field observation. Importance of Field Drainage Poor drainage increases weed growth, especially sedges and water-loving weeds. Farmers should: Create drainage channels Avoid water stagnation Level the field properly Remove weeds from bunds and channels Good drainage also improves herbicide performance and crop growth. Additional Tips for Effective Weed Management Farmers can reduce weed pressure further by following these practices: Use clean and certified seed Follow crop rotation Avoid allowing weeds to produce seeds Remove weeds before flowering Keep field borders clean Use mulching where possible Monitor fields regularly after rainfall Combine manual and chemical methods properly Continuous field observation is important because new weed flushes may appear after repeated rainfall. Common Mistakes Farmers Should Avoid Delaying weed control after weed emergence Spraying wrong herbicide in the wrong crop Using excess herbicide dosage Spraying before heavy rainfall Ignoring weed growth on bunds Depending only on one weed control method Allowing weeds to mature and produce seeds Avoiding these mistakes improves long-term weed management success. Conclusion Weed growth increases rapidly after the first monsoon rain and can seriously affect crop establishment if not controlled early. Weeds compete with crops for nutrients, water, and sunlight during the most important early growth stage. Proper weed management through pre-emergence herbicides, timely post-emergence spraying, manual weeding, drainage improvement, and regular field monitoring is essential. Farmers should choose weed control methods based on crop type, weed species, rainfall condition, and field situation. Early action is the key to reducing weed competition and improving crop growth. Integrated weed management practices help maintain healthy crop stands, reduce production costs, and improve overall yield.
Image

Leaf Curl & Viral Diseases Increasing in Chilli During Humid Weather – Management Tips

Manan Sharma

-

27 May 2026

Introduction Chilli is an important cash crop for farmers, but during humid and cloudy weather, leaf curl and viral diseases can increase quickly in the field. These diseases mainly affect tender leaves, shoots, flowers, and fruit setting. Once a chilli plant is infected by a virus, it cannot be cured completely. Therefore, early identification and prevention are very important. Humid weather supports the fast multiplication of sucking pests like thrips and whiteflies. These insects act as carriers of viral diseases. They move from infected plants to healthy plants and spread the virus while feeding. If farmers ignore the early symptoms, the disease may spread across the field and cause heavy yield loss. Why Leaf Curl and Viral Diseases Increase During Humid Weather During humid weather, chilli plants remain tender and soft. At the same time, pests like thrips and whiteflies become more active. These pests suck sap from leaves and transmit viruses from diseased plants to healthy plants. The disease spreads faster when: Humidity is high Weather is cloudy Whitefly and thrips population is high Weeds are present around the field Crop canopy is dense Infected plants are not removed early Excess nitrogen fertilizer is used Broad-spectrum pesticides are sprayed repeatedly Once virus symptoms appear clearly, the infected plant usually remains weak throughout the season. That is why management should focus on preventing spread. Early Symptoms in Chilli Plants Farmers should inspect the crop regularly, especially during the vegetative and flowering stages. Early symptoms are usually seen on young leaves and growing tips. Common symptoms include: Upward or downward curling of leaves Small and narrow leaves Yellowing or light green patches on leaves Wrinkled or puckered leaf surface Stunted plant growth Shortened internodes Bushy plant appearance Poor flowering Flower drop Reduced fruit setting Small, deformed, or poor-quality fruits Presence of whiteflies or thrips on leaves In severe infection, the plant becomes weak and stops growing properly. If infection occurs at an early stage, yield loss can be very high. Damage Caused by Viral Diseases Leaf curl and viral diseases reduce both plant growth and fruit production. The plant cannot produce healthy leaves, flowers, and fruits. Major losses include: Weak vegetative growth Reduced photosynthesis Poor flowering Low fruit setting Small and curled fruits Reduced fruit size and shine Lower market quality Heavy yield loss in early infection Even if fruits are formed, they may be small, uneven, or less attractive in the market. Role of Thrips and Whiteflies Thrips and whiteflies are the main vectors that spread viral diseases in chilli. They feed on tender leaves and shoots. When they feed on infected plants, they pick up the virus and transfer it to healthy plants. Farmers should not wait for heavy pest population. Even a small number of virus-carrying insects can spread the disease quickly. Early vector control is the most important step in managing chilli viral diseases. Field Monitoring and Scouting Farmers should monitor the field every 3–4 days during humid weather. Early detection helps reduce further spread. During field inspection: Check tender leaves and growing tips Observe leaf curling and yellowing Check the lower side of leaves for whiteflies Look for thrips on young leaves and flowers Identify stunted or bushy plants Remove infected plants early Check weeds around the field Infected plants should be uprooted and destroyed away from the field. Do not throw infected plants on field bunds because they can act as a virus source. Management Tips for Leaf Curl and Viral Diseases Use Resistant or Tolerant Varieties In areas where leaf curl and viral diseases appear regularly, farmers should choose resistant or tolerant chilli varieties if available. These varieties reduce disease severity and help maintain better crop growth. Farmers should select varieties based on local recommendations and disease history of the field. Healthy Seedlings and Nursery Care A clean nursery helps reduce early disease entry. Farmers should: Use healthy seedlings for transplanting Keep nursery weed-free Use insect-proof net where possible Remove infected seedlings immediately Avoid transplanting weak or curled seedlings If infected seedlings are planted in the main field, the disease spreads faster after transplanting. Vector Control Thrips and whiteflies must be managed from the early crop stage. Important practices include: Install yellow sticky traps for whiteflies Install blue sticky traps for thrips Remove weeds around the field Avoid excess nitrogen fertilizer Spray neem-based products during early pest activity Use recommended insecticides only when pest population increases Rotate insecticides with different modes of action Sticky traps help in monitoring pest activity and reducing early pest buildup. Neem and Insecticide Rotation Neem-based products can help reduce sucking pest activity during early infestation. They are useful as part of preventive management and help reduce pest pressure. Farmers should follow this approach: Use neem-based spray during early pest appearance Follow with recommended insecticide only if pest population increases Do not repeat the same insecticide again and again Rotate chemicals with different modes of action Avoid unnecessary broad-spectrum sprays Repeated use of the same chemical can lead to resistance and poor pest control. Nutrient Management to Reduce Stress A stressed chilli crop is more vulnerable to pest and disease problems. Balanced nutrition helps plants remain stronger. Farmers should: Avoid excess nitrogen fertilizer Apply balanced NPK as per crop stage Use potassium properly for better plant strength Apply micronutrients if deficiency symptoms appear Maintain proper irrigation Avoid waterlogging during humid weather Add well-decomposed organic manure to improve soil health Healthy plants can tolerate pest pressure better and continue flowering and fruiting more effectively. Precautions During Spraying Spray during morning or evening hours Avoid spraying during strong winds or rainfall Cover the lower side of leaves properly Use clean water for spray preparation Follow recommended dosage only Do not mix chemicals without expert advice Wear gloves, mask, and protective clothing Follow waiting period before harvesting chilli Since chilli is harvested frequently, safe pesticide use is very important. Preventive Measures for Farmers Farmers can reduce leaf curl and viral disease spread by following these steps: Use healthy and disease-free seedlings Select resistant or tolerant varieties where available Remove infected plants early Keep the field and bunds weed-free Install yellow and blue sticky traps Control thrips and whiteflies from early stage Use neem and insecticides in rotation Avoid excess nitrogen fertilizer Maintain balanced nutrition and irrigation Monitor crop every 3–4 days during humid weather Conclusion Leaf curl and viral diseases in chilli increase rapidly during humid weather because thrips and whiteflies become active and spread viruses from plant to plant. The main symptoms include leaf curling, yellowing, stunted growth, poor flowering, flower drop, and small or deformed fruits. Since viral diseases cannot be cured after infection, farmers should focus on prevention. Healthy seedlings, resistant varieties, weed removal, early infected plant removal, sticky traps, vector control, neem-based sprays, insecticide rotation, and balanced nutrition are important management practices. Timely action helps reduce disease spread, protect chilli flowering, improve fruit quality, and increase marketable yield.

అగ్ర ఎంపికలు

తాజా వార్తలు

జాతీయ పథకాలు

వ్యాధులు & తెగుళ్లు

Image

Top 7 Reasons for Flower Drop in Chilli

yamini

-

26 May 2026

A chilli plant can produce hundreds of flowers, but only a fraction of them become fruits if the conditions are not right. Heavy flower drop is one of the biggest reasons for low yield. Most causes are preventable with simple agronomic steps. Here are the top 7 reasons farmers see flower drop in chilli and exactly how to fix each one. 1. High or Low Temperature Stress Chilli flowering is sensitive to extremes. Day temperatures above 35 °C and night temperatures above 25 °C trigger heavy flower drop. Cold spells below 15 °C also cause abortion. Fix: Schedule sowing so flowering avoids peak summer heat. Use shade nets in extreme zones. Mulching and drip irrigation reduce soil temperature. 2. Boron and Calcium Deficiency Boron is essential for flower formation and pollen viability. Calcium gives strength to flower stalks. Shortage of either causes flowers to dry and fall. Fix: Apply borax 4 to 6 kg per acre in soil before transplanting. Foliar spray borax 0.1 to 0.2 percent and calcium nitrate 0.5 percent at flower initiation and again 10 days later. 3. Excess Nitrogen Heavy use of urea or DAP makes plants leafy and delays flowering. Lush green plants often have very few flowers. Fix: Reduce nitrogen at bud stage. Switch to phosphorus and potassium-rich nutrition. Foliar 0:52:34 at 4 g per litre at bud initiation, and 13:0:45 at 5 g per litre at flowering. 4. Water Stress (Drought or Waterlogging) Both extremes hurt flowering. Drought stops the plant from supporting flowers; waterlogging suffocates roots. Fix: Use drip irrigation. Mulch with paddy straw or plastic. Drain surface water within 24 hours of heavy rain. 5. Thrips, Mites, and Whitefly Attack Sucking pests damage growing points and flower buds. Mites cause leaf curling. Whiteflies transmit chilli leaf curl virus, which devastates flowering. Fix: Monitor weekly with sticky traps. Spray neem oil 3 to 5 ml per litre at first sighting. Use Spinosad, Fipronil, or Diafenthiuron above ETL, following label. 6. Poor Pollination Chilli is mostly self-pollinated but still benefits from bee activity. Sprays during flowering harm pollinators; very dry or very wet weather reduces pollen viability. Fix: Avoid insecticide sprays during morning flowering hours. Plant marigold or coriander on field borders to attract bees. Keep humidity moderate. 7. Viral Diseases Chilli leaf curl virus (CLCV) and chilli mosaic virus cause heavy flower abortion. Once infected, no chemical cures the plant. Fix: Plant tolerant varieties. Use 40 to 50 mesh nursery cover. Aggressively control whiteflies. Remove and destroy infected plants immediately. Quick Action Table Reason Quick Fix Heat / Cold Time sowing, use shade net or mulch Boron / Calcium Foliar borax + calcium nitrate Excess N Switch to 0:52:34 and 13:0:45 Water stress Drip + mulch; avoid waterlogging Sucking pests Sticky traps + neem + ETL-based sprays Poor pollination Avoid bloom sprays, plant marigold borders Virus Resistant variety + whitefly control Conclusion Flower drop in chilli is rarely one problem. A small fix in each area — nutrition, water, pest, and pollination — adds up to a big yield gain. Follow product label instructions and consult your local KVK or extension officer for variety and product recommendations in your district.

Pink Bollworm in Cotton: When to Start Monitoring and How to Reduce Crop Loss

yamini

-

25 May 2026

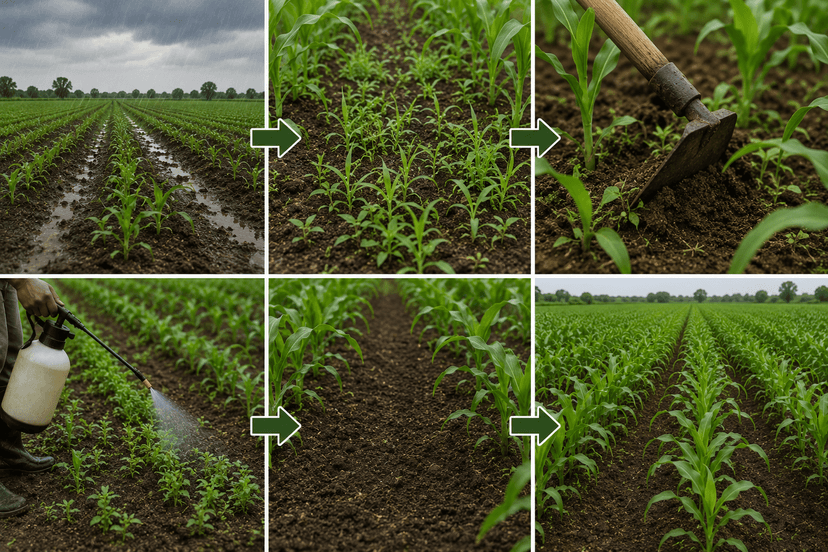
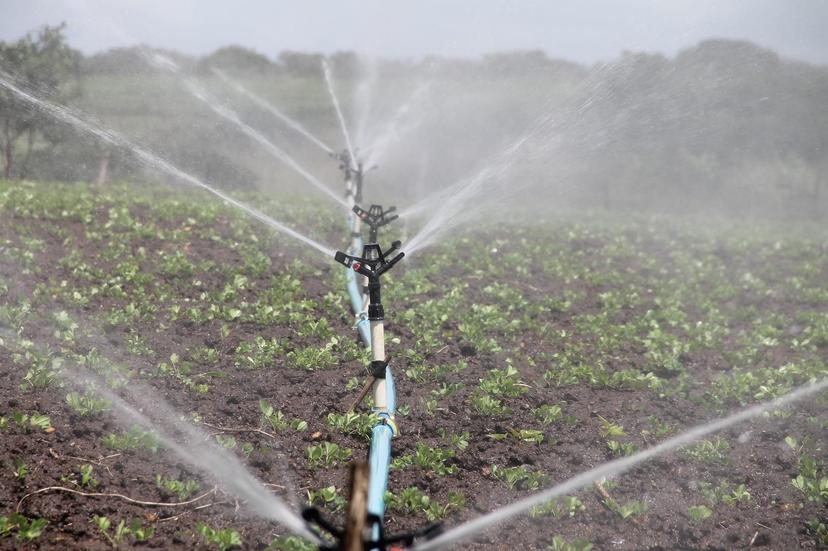
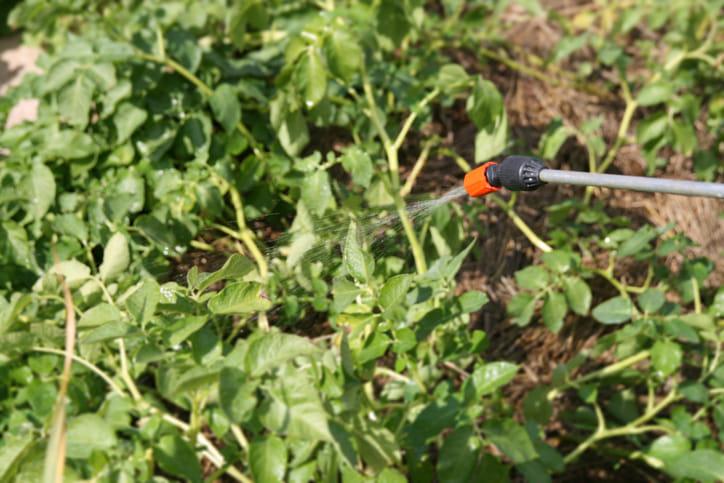
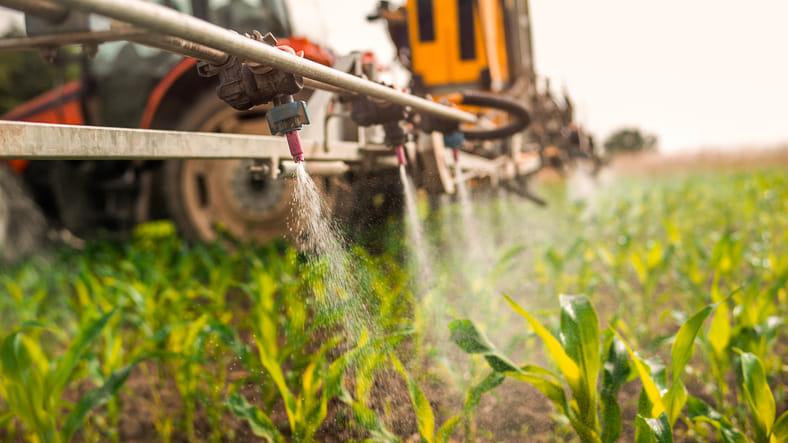
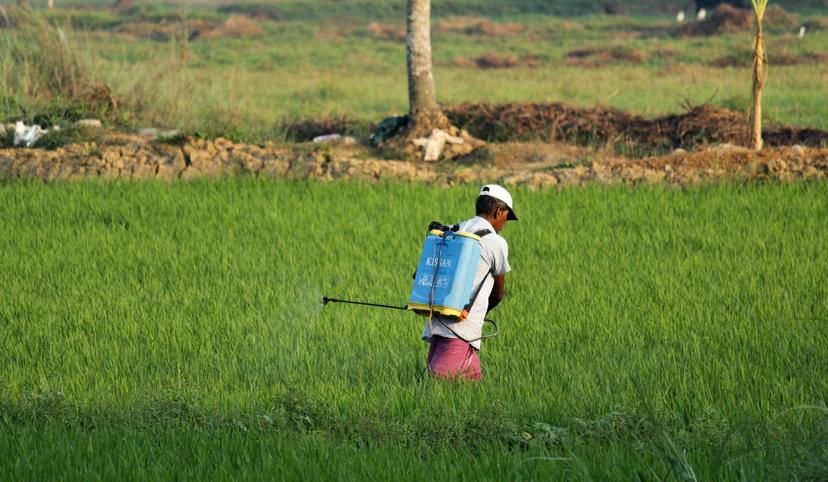
IntroductionCotton is one of the most important cash crops of India, grown across major states like Maharashtra, Gujarat, Telangana, Andhra Pradesh, Karnataka, Punjab, Haryana, and Rajasthan. In recent years, pink bollworm in cotton has become the number one pest, causing huge yield losses even in Bt cotton fields. Pink bollworm has developed resistance to Bt toxins (Cry1Ac and Cry2Ab), and many farmers see severe damage during the boll formation stage. Since the larvae feed inside the boll, sprays do not reach them easily. Early monitoring with pheromone traps, careful scouting, and integrated control are the only effective ways to reduce crop loss.What is Pink Bollworm in Cotton?Pink bollworm (Pectinophora gossypiella) is a small caterpillar pest that attacks flower buds, flowers, and bolls of cotton. The adult is a small grey-brown moth that lays eggs on tender plant parts. The young caterpillars are creamy white but turn pinkish as they grow. They bore inside the flower buds and bolls, feed on the developing seeds and lint inside, and damage the fibre quality. Affected flowers do not open properly and look like a rose bud — known as "rosetted flower". Bolls show small bore-holes that may close up later, making detection difficult. Pink bollworm mainly attacks during the squaring, flowering, and boll formation stages, and early monitoring is the key to effective control.SymptomsRosetted flowers: Flowers fail to open fully and look like a rose bud (typical sign of PBW).Small entry holes on flower buds and green bolls; the holes may close up after the larva enters.Pink-coloured caterpillars (8–12 mm) seen inside the bolls when they are split open.Damaged seeds and discoloured lint inside the bolls.Pre-mature opening of green bolls and badly opened, dirty white locks.Yellowing and dropping of squares and small bolls.Reduced number of pickable bolls and poor fibre quality.Yield impact: 30–60% loss in heavily infested fields and serious quality loss in lint.Farmer Tip: From flowering onwards, randomly pick 20 green bolls from different parts of the field every week. Split them open. If you find pink larvae or fed seeds inside even 5–10% of bolls, pink bollworm is present and immediate action is needed.Favorable ConditionsPink bollworm outbreaks are linked to cropping pattern, sowing dates, and field hygiene. The main favorable conditions are:Long duration cotton crops (more than 180 days), which give continuous food and shelter to the pest.Late sowing and staggered sowing in nearby fields, leading to overlapping flowering.Continuous cotton-cotton cropping without a clean break.Storage of unginned seed cotton near new fields; pupae carry over from old crop.Warm, humid weather (25–32°C) during flowering and boll formation.Use of broad-spectrum chemicals that kill natural enemies.Use of Bt cotton in fields with already developed resistance, without refuge planting.Carrying cotton stalks and stubble between fields without destroying them.Preventive MeasuresUse certified seed of recommended Bt cotton hybrid; do not save Bt seed for next year.Plant the recommended refuge area (non-Bt cotton) around or within the Bt cotton field.Avoid late sowing; follow the recommended sowing window for your region.Terminate the crop on time; do not extend cotton beyond 160–180 days where advised.Plough the field deeply after harvest; destroy stubble and stalks.Do not store unginned seed cotton near new cotton fields.Scout the field weekly and randomly check 20 green bolls per acre for damage.Keep the field free from weeds and host plants like Hibiscus, Abutilon, and Hollyhock.Conserve natural enemies — Trichogramma, lacewings, ants, and predatory bugs.Practice crop rotation with pulses, cereals, or oilseeds wherever possible.Management PracticesPink bollworm should be managed through Integrated Pest Management (IPM). Combine cultural practices, pheromone monitoring, mass trapping, biological control, and need-based chemical sprays. Farmers should not depend only on chemical sprays — once the larva is inside the boll, sprays cannot reach it. Action timing and proper crop hygiene are most important.Mechanical ControlInstall pheromone traps @ 5 per acre at canopy height from squaring stage.Hand-pick and destroy rosetted flowers and damaged bolls.Crush and destroy any pink larvae found in green bolls.Plough deeply after final picking; remove and burn cotton stalks.Avoid storing seed cotton near new fields; destroy old plant residue.Product NameUsageGAIAGEN Pectino® Lure Combo10-12 lure in traps/AcrePink Bollworm Pheromone Lure10-15 lure in traps/AcreCOMBO PACK OF BIO PHERO8-10 lure in traps/AcreBiological ControlBiological control is most useful in the early phase before larvae enter the boll. Egg parasitoids and entomopathogenic fungi help reduce population pressure. Useful BigHaat products include:Product NameTechnical ContentDosageEBS ORGANO KILLEROrganic Insecticide and Larvicide for Effective Pest Control100ml/AcreKatyayani Dr. NeemAzadirachtin 0.30% EC (3000 PPM)1litre/AcreKATYAYANI BT BIO LARVICIDEBacillus Thuringiensis 5*10⁸ CFU gram/min2litre/AcreT. Stanes NimbecidineAzadirachtin 0.30% EC (3000 PPM)1litre/AcreChemical ControlUse chemical insecticides only after monitoring shows pheromone trap catches above 8 moths per trap per night for 3 consecutive nights, or boll damage is more than 10%. Spray in the early morning or evening. Direct spray to flowers, squares, and young bolls. Rotate chemical groups, follow label dosage, and wear safety gear. Avoid mixing too many chemicals.Product NameTechnical ContentDosageDanitol InsecticideFenpropathrin 10% EC300-400ml/AcreSyngenta AmpligoChlorantraniliprole 9.3% + Lambda-cyhalothrin 4.6% ZC100ml/AcreProfex super Profenophos 40% + Cypermethrin 4%400-600ml/AcreBayer DecisDeltamethrin 2.8 EC (2.8% w/w)200ml/AcreSafety Tip: Always read the product label, follow the recommended dosage, and consult a local agronomist before spraying.Best Time to Take ActionStart pheromone trap monitoring from squaring stage (around 45 days after sowing). Release Trichogramma cards from flowering onwards at weekly intervals. Begin scouting bolls every 7 days. Apply biological sprays as a preventive measure during early flowering. Use chemical insecticides only when trap catches cross 8 moths per trap per night for 3 consecutive nights or 10% boll damage is seen. Picking bolls early and destroying damaged bolls during routine field walks also reduces the carry-over of larvae.Common Mistakes Farmers Should AvoidSpraying only on the top canopy; PBW eggs and larvae are inside flowers and bolls.Extending cotton crop beyond 180 days, giving extra time for PBW build-up.Storing unginned cotton near new fields — pupae carry over to next crop.Saving Bt cotton seed for next sowing — leads to faster Bt resistance.Using only one chemical group repeatedly; PBW develops resistance fast.Not installing pheromone traps for early monitoring.Spraying just before rain — chemical washes off and money is wasted.ConclusionPink bollworm is the biggest yield robber in Indian cotton today. Once the caterpillar enters the boll, sprays cannot reach it, and yield is already lost. The best protection is early monitoring with pheromone traps, weekly boll inspection, and timely action. Follow the right sowing window, plant the refuge as advised, and terminate the crop on time. Use Trichogramma cards, neem, and biological sprays as preventive tools. Apply chemical insecticides only when monitoring shows clear threshold crossing, and rotate chemical groups every spray. Always follow label dosage, spray at the right time, and wear safety gear. Integrated management protects yield and keeps the cropping system healthy for the next season.Note: The information contained herein is for informational purposes only. Nothing herein shall be construed to be financial or legal advice. Viewers are advised to do their own research before making any decisions.

అగ్రి హ్యాక్స్

ఫీల్డ్ తయారీ

Image

Complete Spray Schedule for Paddy (30–120 DAT)

yamini

-

26 May 2026

Day After Transplanting (DAT) is the most reliable way to plan paddy sprays because it ties the application to actual crop physiology, not to the calendar. This guide walks through the entire 30 to 120 DAT window, with stage-matched sprays for nutrients, weeds, pests, and diseases — useful across kharif and rabi seasons in Indian conditions.Why DAT-Based Spraying WorksPaddy moves through clearly defined stages: tillering, panicle initiation, booting, flowering, milky, dough, and maturity. Each stage has its own pest, disease, and nutritional need. DAT-based scheduling avoids over-spraying and missed sprays.30 to 45 DAT: Active TilleringFoliar spray 19:19:19 NPK at 5 g per litre to support tillering.Apply Cartap Hydrochloride 50 SP or Chlorantraniliprole 18.5 SC for stem borer if dead heart is seen.Spray Propiconazole 25 EC or Hexaconazole 5 SC at 1 ml per litre for sheath blight on lower leaves.Continue post-emergence weed control with Bispyribac Sodium or Pyrazosulfuron if missed earlier.45 to 60 DAT: Late Tillering / Panicle InitiationMost yield-decisive stage — sprays here have the highest payoff.Spray Tricyclazole 75 WP at 0.6 g per litre for leaf blast.Monitor BPH at plant base; treat above ETL with Pymetrozine 50 WG or Buprofezin 25 SC.Foliar 0:52:34 (MAP) at 4 to 5 g per litre supports panicle development.Apply potassium nitrate or 13:0:45 at 5 g per litre to strengthen stem.60 to 75 DAT: Booting StageSpray Azoxystrobin + Difenoconazole or Tricyclazole 7 to 10 days before heading for neck blast prevention.Watch for leaf folder; treat above ETL with Flubendiamide or Chlorantraniliprole.Continue water depth of 4 to 5 cm; do not drain.Foliar 0:0:50 (SOP) helps panicle filling.75 to 90 DAT: Flowering StageAvoid insecticide sprays during peak bloom hours to protect pollinators.Spray Validamycin or Hexaconazole for sheath blight if still active.Maintain steady water; drought now causes empty grains.Foliar boron 0.1 percent at 0.1 to 0.2 percent in soils known to be boron deficient — follow label.90 to 105 DAT: Milky to Dough StageSpray Propiconazole or Tebuconazole for false smut and sheath rot at boot leaf.Watch for late BPH and hopper burn; spot-spray Dinotefuran or Pymetrozine.Foliar potassium spray (13:0:45 at 5 g per litre) improves grain weight.105 to 120 DAT: Grain Filling and MaturityMost spraying ends here.Drain field 7 to 10 days before expected harvest.Observe pre-harvest interval of any fungicide or insecticide used earlier — strict label compliance is required.Quick Reference TableDAT WindowStageSpray Focus30–45TilleringStem borer, sheath blight, NPK45–60Panicle InitiationBlast, BPH, MAP, SOP60–75BootingNeck blast prevention, leaf folder75–90FloweringSheath blight, water, pollinator care90–105Milky/DoughFalse smut, BPH, K spray105–120Grain FillFinal monitoring, drain fieldCommon Mistakes to AvoidUsing one fungicide repeatedly — leads to resistance.Spraying just before heavy rain.Mixing too many inputs in one tank without checking compatibility.Skipping panicle initiation spray — the single biggest yield loss point.ConclusionA 30 to 120 DAT spray schedule keeps paddy protected through every key stage. Always read the product label, follow the dose and pre-harvest interval, rotate chemical groups, and consult your local KVK or agriculture officer for region-specific advisories.

రాష్ట్ర పథకాలు

మీకు ఆసక్తికరంగా ఉండవచ్చు

భారతదేశపు అతిపెద్ద వ్యవసాయ వేదిక

400+

బ్రాండ్లు

30M+

రైతులకందించిన సేవలు

9K+

ఉత్పత్తులు

95%+

పిన్ కోడ్ లకు అందించిన సేవలు