Cucumber Mosaic Virus: Symptoms, Spread and Management Measures
Introduction
Cucumber is a fast-growing vegetable crop and gives good returns when plants remain healthy, vines grow properly, and fruits are uniform in size and shape. However, viral diseases can seriously affect cucumber cultivation, and cucumber mosaic virus is one of the important viral problems seen in cucurbit crops. Once a plant gets infected, it cannot be cured completely. Therefore, farmers should focus on early identification, removal of infected plants, control of insect vectors, and preventive crop management.
Cucumber mosaic virus affects leaves, vines, flowers, and fruits. Infected plants show mosaic patterns, leaf distortion, weak growth, and poor fruit development. Fruits may become small, misshapen, rough, or unmarketable. The disease can spread quickly in the field, mainly through aphids and infected weed hosts. Timely monitoring is the best way to reduce crop loss.
What is Cucumber Mosaic Virus?
Cucumber mosaic virus, commonly called CMV, is a viral disease that affects cucumber and many other crops. It can also infect other cucurbits like bottle gourd, bitter gourd, pumpkin, muskmelon, watermelon, and ridge gourd. Apart from cucurbits, many weeds and other crop plants can also carry the virus.
The virus does not spread like a fungal disease through soil spots or leaf lesions. It usually spreads through sucking insects, mainly aphids. These aphids pick up the virus from infected plants and carry it to healthy plants while feeding. Because the virus spreads quickly, even a small number of infected plants can become a source of infection for the whole field.
Symptoms of Cucumber Mosaic Virus
Farmers should inspect cucumber plants regularly from the early vegetative stage. Viral symptoms may first appear on young leaves and growing tips.
Common symptoms include:
Light and dark green mosaic pattern on leaves
Yellow mottling on young leaves
Curling and puckering of leaves
Narrow, distorted, or uneven leaf growth
Reduced leaf size
Shortened internodes and stunted vines
Weak plant growth
Poor flowering and fruit setting
Small and deformed fruits
Rough, bumpy, or uneven fruit surface
Patchy green and yellow discoloration on fruits
Reduced fruit quality and market value
In the early stage, farmers may notice light green patches on leaves. Later, the leaves become wrinkled, curled, or distorted. In severe infection, the plant looks weak and does not spread properly. Fruits from infected plants may not develop normal shape and size.
Fruit Damage and Yield Loss
Cucumber mosaic virus causes heavy loss because it affects both plant growth and fruit quality. A plant infected at the early stage may remain stunted throughout the crop period. Such plants produce fewer flowers and fewer fruits.
Fruit symptoms are very important because cucumber is sold mainly based on appearance, freshness, and uniform shape. Virus-affected fruits may become:
Small in size
Twisted or curved
Rough or bumpy
Uneven in color
Poor in shine
Less attractive in the market
Even if fruits are produced, traders may reject them or offer a lower price. Early infection causes more yield loss compared to late infection because the plant has less time to recover and produce healthy fruits.
How Cucumber Mosaic Virus Spreads
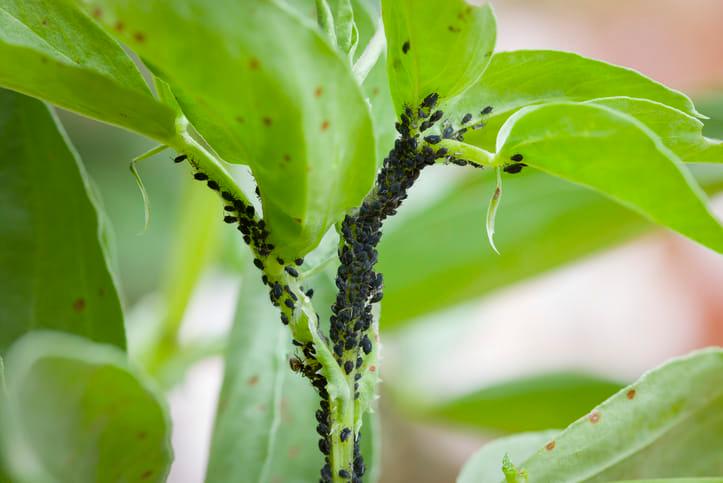
Cucumber mosaic virus spreads mainly through aphids. Aphids are tiny sucking pests that move from plant to plant and feed on tender leaves. They can spread the virus very quickly, even before farmers notice heavy aphid population.
The disease can spread through:
Aphids feeding on infected plants
Infected weeds near the field
Virus-infected cucurbit crops nearby
Volunteer plants from previous crops
Movement of aphids from surrounding fields
Use of infected seedlings
Poor field sanitation
One important point is that aphids can transmit the virus quickly. Therefore, waiting until aphid population becomes high may not be safe. Farmers should focus on preventing aphid entry and removing virus sources from the field.
Favorable Conditions for Disease Spread
Cucumber mosaic virus becomes more common when aphid movement is high and infected plants are present nearby. Farmers should be more alert during:
Warm weather with active aphid movement
Presence of weeds around the field
Nearby infected cucurbit crops
Continuous cucurbit cultivation in the same area
Poor field sanitation
Tender crop growth stage
Dry weather that favors aphid movement
Lack of regular field monitoring
Weeds are a major hidden source of the virus. Even if the cucumber crop is healthy, aphids may bring the virus from infected weeds or nearby crops.
Field Monitoring and Early Detection
Regular monitoring helps farmers reduce the spread of cucumber mosaic virus. Farmers should check the field every 3–4 days, especially during early crop growth.
During field inspection:
Check young leaves for mosaic pattern and yellow mottling.
Observe growing tips for curling or distortion.
Compare weak plants with healthy plants nearby.
Look for stunted vines in patches.
Inspect fruits for uneven shape and color.
Monitor aphid activity on tender leaves.
Remove suspicious infected plants early.
Infected plants should not be kept in the field because they act as a virus source for aphids. Early removal helps protect healthy plants.
Management Measures for Cucumber Mosaic Virus
There is no direct cure for cucumber mosaic virus after infection. Management should focus on prevention, vector control, field sanitation, and healthy crop practices.
Use Healthy Seedlings
Farmers should start with healthy planting material. If seedlings are raised in a nursery, the nursery should be clean and protected from aphids.
Important practices include:
Use healthy and disease-free seedlings.
Avoid transplanting weak or suspicious seedlings.
Keep nursery areas weed-free.
Use insect-proof netting in nursery where possible.
Remove infected seedlings immediately.
A clean nursery reduces the chance of early disease entry into the main field.
Remove Infected Plants and Weeds
Field sanitation is very important in viral disease management.
Farmers should:
Remove infected plants as soon as symptoms appear.
Uproot infected plants carefully and destroy them away from the field.
Do not throw infected plants on field bunds.
Remove weeds from inside and around the field.
Destroy volunteer cucurbit plants from previous crops.
Keep irrigation channels and bunds clean.
This reduces the virus source and lowers the chance of aphids spreading the disease.
Aphid Management
Since aphids are the main carriers, controlling their movement is important.
Farmers can follow these practices:
Install yellow sticky traps for aphid monitoring.
Use reflective or silver mulch where possible to repel aphids.
Avoid excess nitrogen because soft growth attracts aphids.
Monitor tender leaves regularly.
Conserve natural enemies like ladybird beetles and lacewings.
Use recommended insecticides only when aphid population increases.
Aphid control should be done early. Once the virus spreads inside the plant, insecticide cannot cure the infected plant.
Crop and Field Management
Healthy crop growth helps reduce disease impact.
Useful practices include:
Follow crop rotation with non-cucurbit crops.
Avoid growing cucumber near infected cucurbit fields.
Maintain proper spacing for good air movement.
Avoid continuous cucurbit cultivation in the same field.
Use balanced fertilizers.
Avoid excessive nitrogen application.
Maintain proper irrigation to avoid plant stress.
Strong and healthy plants can tolerate stress better, though they still need protection from virus spread.
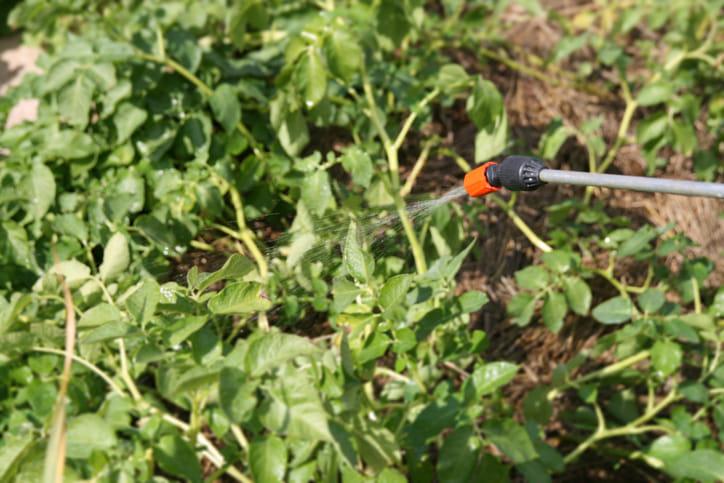
Precautions During Spraying
If farmers use insecticides for aphid control, they should follow safe spraying practices:
Spray during morning or evening hours.
Avoid spraying during strong winds or rainfall.
Cover tender shoots and lower leaf surfaces properly.
Use only recommended dosage.
Do not repeat the same insecticide continuously.
Wear gloves, mask, and protective clothing.
Follow the waiting period before harvesting fruits.
Unnecessary spraying should be avoided because it may kill beneficial insects and increase pest problems later.
Preventive Tips for Farmers
Farmers can reduce cucumber mosaic virus by following these steps from the beginning:
Use healthy seedlings.
Keep nursery and field weed-free.
Remove infected plants early.
Install yellow sticky traps.
Use reflective mulch if available.
Monitor aphids regularly.
Avoid planting cucumber near infected cucurbit crops.
Follow crop rotation.
Maintain balanced nutrition and proper irrigation.
Conclusion
Cucumber mosaic virus is a serious viral disease that affects cucumber leaves, vines, flowers, and fruits. The main symptoms include mosaic leaf pattern, yellow mottling, leaf curling, stunted growth, poor fruit setting, and deformed fruits. The disease spreads mainly through aphids and infected weed hosts.
Since infected plants cannot be cured, farmers should focus on prevention. Healthy seedlings, weed removal, early rouging of infected plants, aphid monitoring, sticky traps, reflective mulch, crop rotation, and balanced crop management are important measures. Timely action helps reduce virus spread, protect fruit quality, and improve marketable yield.