Latest Articles

Image

15 Steps to Boost Cauliflower Production

Mohit J

-

03 November 2022

Do you want to earn bulk profits from cauliflower farming? Ditch the complex ways of cauliflower cultivation and follow the 16 easy steps for adequate growth and profitable yield of cauliflower. A step-by-step guide to implementing the organic growth of cauliflower varieties, including preparation, selection, tips, and technique to achieve high yield. Table of Contents 15 Steps to Boost Cauliflower Production. Introduction to Cauliflower Cultivation Light and soil requirements for cauliflower growth Pick the seed patiently Choose a suitable place for growth. Correct planting process of cauliflower How to grow a massive head of cauliflower Requirement of water Expand the size Adequate spacing Removal of bolt Fertilization Reasons for small head Management of weed Reasons for spreading heads Preventions Harvesting FAQs Name three cauliflower varieties? Which seeds are best to grow cauliflower varieties? How to do after-care for soil? Introduction to Cauliflower Cultivation Cauliflower is a nutrition-packed vegetable that grows in several parts of the world in the winter season. The Cole family consists of cauliflower, Broccoli, Kale, Brussels sprouts, Collards, and Kohlrabi. The scientific name of cauliflower is Brassica oleracea var. Botrytis. The vegetable is even available in summers because of technologically supported storage. Cauliflower dominate many Indian household meals and offer a vibrant taste to the food. The attractive color also attracts and activates appetite, boosts the metabolism, and motivates healthy functioning of the body. Cauliflower cultivation is developing roots due to health advantages. Like broccoli is a favorite meal option of fitness or gym freaks. How often do you eat the cauliflower?  Well, here are well-tested, proven 16 ways to increase the growth of cauliflower cultivation. Cauliflower farming Light and soil requirements for cauliflower growth Sandy and loamy soil is the top preference for growing cauliflower varieties. The soil must be well-drained, moist, and rich with organic nutrients. The cauliflower extracts moist very fast from the soil to avoid buttoning in the crop. The soil’s pH level must lie between 6.5-6.8, which makes the soil acidic and indirectly protects from root diseases.  Due to improper light reach to cauliflower heads, they turn pale or yellow, which customers do not prefer. Sunlight plays a vital role in producing white head cauliflower varieties. Very often, farmers cover the head of the flower to keep them bright white  Pick the seed patiently Most farmers make the same mistake of not reading information available on seed packets. It results in the crop being unsuitable for the USDA Hardiness Zone.  The maturity and growth must match the present climate as cauliflower cultivation requires 15-21 degrees temperature to harvest on time. Either sow in autumn or spring; choose seeds with a minimum maturity period with temperature acceptance or tolerance. Choose a suitable place for growth Search for a solar farm with partly shades to grow cauliflower varieties to gain all the energy from the sun. Sun’s energy will activate the growth even faster and turn into a big white head cauliflower. The right time and care can boost cauliflower plant’s growth in mixed soil without any geographical boundaries. Correct planting process of cauliflower Prepare the land before the plantation to provide adequate growing space and air circulation. Make 30 inch gaps between rows and 18-24 between each plant. Plant the crop deep down to avoid the overweight issue during the growing phase. The plant of cauliflower varieties requires adequate moisture and can’t stand in dry soil at high temperatures. If you want to harvest in fall, plant 8-12 weeks before the autumn’s first frost with a temperature around 23 degrees. If the temperature falls and becomes extra cold for the crop, consider covering with old milk jugs. Covering will prevent button development. How to grow a massive head of cauliflower To grow the big head of cauliflower, opt for organic or hybrid seeds at the right temperature. It takes 50-55 days to produce the cauliflower with big heads and loads of nutrients. Requirement of water As the cauliflower varieties extract moisture from the soil, irrigation is most important but make sure to assess the soil and climate before watering. Water supply of 1 inch once a week is recommended, such that it should soak in 6-8 inches of soil. The most amount of water is needed till the germination of seeds and formation of the flower. In summer, watering once a day becomes necessary but continuously check the soil needs and climatic conditions.   Expand the size Cauliflower farming Maintain the moisture in the soil; keep checking the temperature to maintain the right ecosystem for cauliflower varieties. Try to cut down the hindrance in the way of fuller crop growth. Some conditions are humidity, cold or extremely hot weather, and pests. Weeding should be done whenever needed or whenever the weed growth is observed. Adequate spacing Make rows for plantations of different cauliflower varieties to avoid confusion. Make rows with a 30-35 inches gap and a 21-25 inches gap between each plant. This practice will promote air circulation and prevent over-shadowing. Removal of bolt pluck the bolts developed in the cauliflower due to extreme hot or cold temperatures. Fertilization Fertilizers are proven heroes for boosting nutrients and moisture in the soil and high-yield crops. The cauliflower crop needs NPK(48:24:24 Kg/acre.) full doses of P and K as basal, half dose N at 15 days after transplanting and the remaining N after 45-55 days. Reasons for small head There are plenty of reasons for small head cauliflower, such as soil deficiency, seedling stress, overcrowding, climate fluctuation, inadequate drainage, less moisture, insects, and diseases. Management of weed Weed control once a week is essential. It directly protects the soil. Choose the organic options for weeding as they become a hindrance to yield. Reasons for spreading heads The reasons behind spreading heads of cauliflower varieties can be random climate fluctuation, ruined head of crop, drought, insufficient irrigation, and less nutrition through the soil. Decrease irrigation at the maturity phase, let the flower breathe, avoid excess NPK and partly cover the farm to prevent excess rainfall water. Care tips for yield  Keep an eye on beetles, worms, and other pests to save both the cauliflower heads and roots. Provide enough space and avoid overshadowing to promote individual growth. Maintain moisture in the soil, control the fertilizer portions, formulate the uncertainties, and prepare for it. Preventions Follow a few practices that directly or indirectly incorporate health into the crop. Such activities are container plantation, resistance cauliflower varieties, crop rotation, and avoiding excess nitrogen. Harvesting Once the crop reaches the growth phase, the heads grow quickly. It takes 50-70 days to ripen cauliflower varieties fully. After the leaves start turning pale, in 7-10 days it is ready to harvest. Cut the cauliflower from the main stem with few leaves attached to it, to protect the head. Make sure to export them as soon as possible as they lose quality fast. Cauliflower farming FAQs Q1. Name three cauliflower varieties? – Here are the three wide cauliflower varieties: First season crops include early synthetic, Pusa Katki, Early kunwar, Pant gobhi 2, and 3. Major season crops include Punjabi Giant 35, Pant synthetic, Punjabi Giant 26, and Pant shubhra. Last season crops such as Dania Kalimpong, Snowball 16, and Pusa snowball 1 and 2. Q2. Which seeds are best to grow cauliflower varieties? – These are the five cauliflower varieties with short maturity phases and high-temperature tolerance. Snow king Snow crow. Snowball 123 Imperial -10 Self-Blanche Q3. How to do after-care for soil? – The cauliflower varieties draw plenty of moisture from the soil and leave it dry. Prepare a consistent routine to keep the soil moist and fertile for the next crop session. Spread organic fertilizers, compost, manure, vermin-waste, liquid fertilizers, and proper irrigation. Note: The information contained herein is for informational purposes only. Nothing herein shall be construed to be financial or legal advice. Pesticides are a considerable risk of loss in crops and viewers are advised to do their own research before making any decisions.
Image

Nutritional needs of Maize crop and application of Fertilizers

Swati

-

04 November 2022

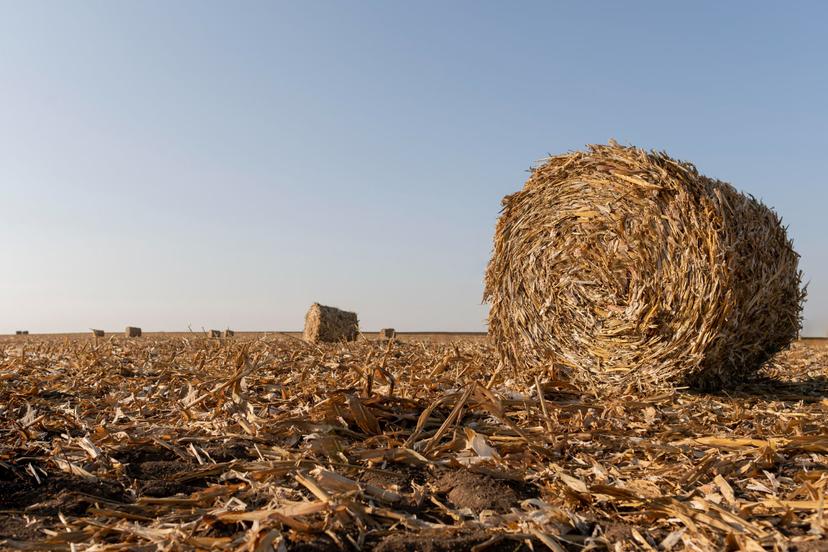
  Maize rewards so much nutrition to our body but do you know where maize gains the food? Well, it gains nutrients from the soil, indicating the first requirement for maize farming. Only premium quality soil can take the load of maize, and to maintain the nutrient level of soil, it needs a regular boost. Nutrients such as nitrogen, phosphorus, potassium, and organic fertilizers will rejuvenate soil fertility and soil nutrition. The maize crop is a stable food option and a significant crop for farmers in many parts of the world. Let’s read about the fertilizers that are best for both soil and maize crops. Table of contents Nutritional needs of maize crop NPK and other nutrients for growth Manure & compost Fertilizer for irrigated and rainfed maize crop FAQs What is the pre-treatment of biofertilizer and seeds? What are the options available in the Organic management of nutrients? What is the ratio of NKP for maize crops? Nutritional needs of maize crop Maize farming Maize crop requires high-level nutrition from soil which needs premium quality fertilizers. Perform a soil test before adding the proportion of fertilizer to the ground. Maize crop needs 40 % N, 25% P,  20% K, and the remaining small portion of micronutrients for better and high yield. NPK and Zn are the best sources for crop growth and a good yield of maize, either organic or inorganic fertilizer, is required for the entire crop growth period. Fertilizer requirements for the maize crop will be based on selected varieties. NPK and other nutrients for growth Apply recommended NPK fertilizers as per soil test. If there is no soil test then adopt a blanket recommendation of 27.4 kg N, 4.8 kg P, and 18.4 kg K. per acre.  check for the extra husk or crop residue and organic waste present in the soil then we have to give nutrients as per the requirement of the soil and crop. Excess nitrogen can degrade soil fertility, and crop growth and reduce the yield of the crop. Phosphorus helps in the overall development and root growth of crops. It also reduces resilience and frostbite. Potassium plays a vital role in regulating water, and sugar in the crop. Potassium is essential at the mid-stage i.e., cob initiation and silking stage of maize crop. The application of micronutrients, like calcium, sulfur, Magnesium, Boron, and zinc are great nutrients required for crops and soil which will help in the retention of soil fertility and also increase the crop yield.  Manure & Compost To increase the productivity of the maize crop, well-decomposed compost is necessary. Mix the soil with  FYM of 4-5  tonnes per/acre 25 days before sowing the crop in order to increase soil fertility, crop growth, and crop yield.  Fertilizer requirement for irrigated and rainfed maize For Irrigated maize, choose FYM or compost at  4-5 tonnes per acre during land preparation before sowing, application of 1-2 kg of Azospirillum will help in increasing the soil fertility for good crop growth.  Follow the same amount of FYM or compost or coir pith in rainfed soil and spread it. Next, take ten packets of Azospirillum and phosphobacteria, or 4 kg of Azophos, and leach in the ground. Rainfed maize crop needs more fertilizer than compared to irrigated maize crop. FAQs Q1. What is the pre-treatment of biofertilizer and seeds? Ans. Seeds must be treated with 600g/ha of Azospirillum and phosphobacteria.  Q2. What types of organic fertilizers are used to improve the nutrients in maize crops by adding soil? – There are the best four fertilizers options that can help the growth and add the right amount of nutrients for the maize crop:- Green manuring. Application of soil Azospirillum/Azotobacter with VAM and PSB. add straw or compost and leave 10-30% of crop residues like wheat, paddy, and maize crop. Pre-treatment of regular and hybrid seeds. Q3. What is the ratio of NPK for maize crops? – Make sure to check the requirement of NPK in the soil and prepare a balanced mixture of 140 N, 65 P, and 50 K – Kg/ha-1. Note: The information contained herein is for informational purposes only. Nothing herein shall be construed to be financial or legal advice. Pesticides are a considerable risk of loss in crops and viewers are advised to do their own research before making any decisions.

Top Picks

Latest News

News Image
Publisher Icon

The Economic Times

| 12 March 2021

Govt to set up food processing hubs for niche products in Madhya Pradesh Bihar and J&K

Also, to facilitate exports of perishable commodities, the ministry and the Airports Authority of India are setting up cold chains and infrastructure in major aviation hubs across the country, said Reema Prakash, joint secretary, ministry of food processing industries.
News Image
Publisher Icon

Agribusiness Global

| 12 March 2021

BASF Strengthens Innovation Pipeline for Sustainable Agriculture

The pipeline supports the company’s goal to annually increase its sales share of ag solutions with substantial contribution to sustainability by 7%.
News Image
Publisher Icon

Newsrapindia

| 12 March 2021

Stellapps, IPPB tie up to drive financial inclusion for dairy farmers

Dairy-tech start-up Stellapps has tied up with India Post Payments Bank (IPPB) to digitise the milk procurement worth chain and promote banking services at milk assortment centres. As a part of memorandum of understanding, a pilot venture has been launched in 4 villages with 200 farmers at a greenfield dairy in Tamil Nadu’s Dharmapuri district.
News Image
Publisher Icon

Krishijagran

| 12 March 2021

Kharif Marketing Season 2020-21: Govt Buys Paddy Worth Rs 1.26 Lakh Crore at MSP

Despite ongoing farmers protests against three new farm laws, procurement of Kharif paddy has risen nearly 15% to 669.59 lakh tonnes at MSP so far in the current Kharif marketing season, costing over Rs 1.26 lakh crore. In October, the Kharif Marketing Season (KMS) begins. Paddy is a major Kharif (summer-planted) crop, but it is also planted in the rabi (winter-planted) season.

National Schemes

Diseases & Pests

Image

Cotton Disease Management: The Key to Higher Yields and Bigger Profits

Ramesh Krishi

-

20 September 2025

Cotton (Gossypium sp) is one of the most important fibre and cash crop in India. It is vulnerable to infections by pathogens like fungi, bacteria and viruses. All parts of the plants are infected and crop losses are common in the crop. Cotton diseases can significantly reduce crop yield and cotton quality leading to reduced profits for farmers.   The severity of yield loss depends on the type of disease, the timing of infection, and the environmental conditions. The estimated average yield loss due to cotton diseases in India ranges from 10% to 15%. However, in severe outbreaks, yield losses can be as high as 50% or more. Effective disease management can help minimize crop losses and improve yield.  The Major Diseases of Cotton having significant impact on cotton yield are as follows; Fusarium Wilt of Cotton: Scientific name of causal agent: Fusarium oxysporum f.sp. vasinfectum  Stage of occurrence: Affects at all stages of the crop  Fusarium Wilt of Cotton Symptoms:  Initially the symptoms appear as yellowing and browning of cotyledons and the base of petiole shows brown ring  It is followed by wilting and drying of the affected seedlings  Affected plant’s leaves loses turgidity, gradually turns brown, droops and finally drops off  Tap roots are usually stunted with a smaller number of lateral roots.  Vascular tissues show browning or blackening symptom and black streaks or stripes may extend upwards to the branches and downwards to the roots  Affected plants become stunted with fewer bolls which are very small and opens before attaining maturity  Favourable conditions for Fusarium wilt infection in cotton:  Soil temperature of about 20 – 30°C, warm and dry weather followed by rain, high dosage of nitrogen and phosphatic fertilizers, black soils with high alkaline reactions, and wounds caused by nematode and grubs of ash weevil are favourable conditions for fusarium wilt infestation in cotton.  Verticillium wilt of Cotton: Verticillium wilt in cotton Scientific name of causal agent: Verticillium dahliae  Stage of occurrence: Square and boll formation stage  Verticillium Wilt of Cotton Symptoms:  Early infection leads to stunted growth of the plant  ‘Bronzing of veins’ followed by yellowing of leaves and interveinal chlorosis  It is followed by yellowing of leaves and interveinal chlorosis  Affected leaves dry up giving scorched appearance  Drying of leaf margins and areas between the leaves gives “Tiger stripe” or “Tiger claw” appearance  Branches remain barren due to falling of affected leaves  When infected stems and roots are split open, pinkish appearance of woody tissue can be seen  Affected plants may produce smaller bolls with immature lint  Favourable conditions for Verticillium wilt infection in cotton:  High nitrogen fertilization, heavy soil with alkaline reaction, low soil temperature (15-20°C), excessive soil moisture or poor drainage in soils, lack of crop rotation and presence of host crops like tomato, brinjal, chilli, bhendi can create favourable conditions for verticillium wilt infection.  Management of Fusarium wilt and Verticillium wilt disease in cotton:  Product name  Technical content  Dosage (per acre or per lit water)  Biological Management  Nanobee 7 Star Bio Fertilizer Beneficial Lyophilized Microbes Consortia: 1.5 %  Mix 25-50 gm/lit of water and keep it in shade for 3-5 hr. Then mix it in 200 lit of water  Amruth Almonas Bio Fungicide Pseudomonas sp  2ml/lit water  Terra Fungikill Herbal formulation    2 ml/lit water  Ecoderma Bio Fungicide Trichoderma viride  Seed treatment: 10 gm/lit water  Soil application: 2 – 3 kg Ecoderma +150 – 200 kg FYM  Chemical management   Benmain Fungicide Carbendazim 50% DF  Soil drenching: 2 gm/lit water  Amistar Fungicide Azoxystrobin 23% SC  Drenching/Spraying: 0.5 – 1 ml/lit water  Ridomil Gold Fungicide Metalaxyl 4% + Manconzeb 64%    Soil application: 1 – 1.5 gm/lit water  Taqat Fungicide Hexaconazole 5% + Captan 70% WP  Drenching: 2 gm/lit water  Roko fungicide Thiophanate Methyl 70% w/w  Foliar spray: 1 gm/lit water   Drenching: 2 – 4 gm/lit water  Dithane M45 fungicide Mancozeb 75% WP  Spraying: 2 – 2.5 gm/lit water    Root rot of Cotton: Root rot in cotton Scientific name of causal agent: Rhizoctonia bataticola  Stage of occurrence: Seedling to vegetative stage  Root Rot of Cotton Symptoms:  3 types of symptoms caused by the pathogen – Seedling disease, sore shin and root rot    Seedling stage:   Germinated seedling affected by the fungus shows black lesions on hypocotyl  Causes girdling of stem and death of affected seedling  Sore shin stage:  Dark reddish-brown canker appears on stem near soil surface, later turning black  Drying of leaves and entire plant due to plant breakage at the collar region  Root rot:  Bark of affected plant shreds and may extend above ground level  Dark brown sclerotia appears on the wood or on the shredded bark  Entire root system becomes rotted, plants dry and can be easily pulled out  Favourable conditions for root rot infection in cotton:  Heavy rainfall followed by dry weather, high soil temperature of about 35 – 39°C, presence of host crop like vegetables, growing cotton after cultivation of oilseeds and legumes, wound caused by nematodes and ash weevil grubs increases root rot disease incidence.  Management of root rot disease in cotton:  Product name  Technical content  Dosage (per acre or per lit water)  Biological Management  Nanobee 7 Star Bio Fertilizer Beneficial Lyophilized Microbes Consortia: 1.5 %  Mix 25-50gm/lit of water and kept it in shade for 3-5 hr. Then mix it in 200 lit of water  Multiplex Nisarga Trichoderma viride 1.5% WP   1 – 2 kg Multiplex Nisarga + 100 kg FYM  Ecomonas Bio Pesticide Pseudomonas fluorescens  Drenching:10 gm/lit water  Soil application: 10 – 15 gm/lit  Anand Dr Bacto’s Herz Spores and conidia of Mycoparasitic Fungi  10 ml/lit water  Chemical Management  Vitavax powder 75% Fungicide Carboxin 37.5% + Thiram 37.5% DS  Seed treatment: 3 gm/kg seed  Dhanustin Fungicide Carbendazim 50% WP  Drenching: 0.5 – 0.75 gm/lit water  Sprint Fungicide Mancozeb 50% + Carbendazim 25% WS  Drenching: 2.5 to 3 gm/lit water  Katyayani Samartha Carbendazim 12% + Mancozeb 63% WP  Spraying: 1.5 – 2 gm/lit water    Areolate mildew / Grey Mildew of Cotton: Scientific name of causal agent: Ramularia areola   Stage of occurrence: Seedling to Reproductive stage   Symptoms of Areolate or Grey mildew in cotton:  Irregular to angular pale translucent lesions appear on the lower surface of affected leaf  Light green or yellow green specks appear on the upper leaf surface  Whitish grey powdery growth appears on the lower surface, later coalesce and cover the entire leaf surface  Under severe infection, white/grey powdery growth may occur on the upper leaf surface  Affected chilli leaves dry up from margin, curl inward, turn yellow and fall off prematurely.  Favourable conditions for Grey / Areolate mildew infection in cotton:  Wet humid conditions, Low temperature (20 – 30°C), close planting, very early or very late sowing of cotton, intermittent rains and excessive application of nitrogenous fertilizers may increase grey mildew infection in cotton field.  Management of Grey mildew in cotton:  Product name  Technical content  Dosage (per lit water)  Biological Management  Amruth Abacil Liquid Bacillus subtilis 2% A.S  1 ml/lit water  Chemical Fungicide  Amistar Top Fungicide Azoxystrobin 18.2% + Difenoconazole 11.4% SC  Foliar: 1 ml/lit water  Taqat Fungicide Hexaconazole 5% + Captan 70% WP  Foliar: 2 gm/lit water  CM 75 Fungicide Carbendazim 13%+Mancozeb 63%  Foliar: 1.5 gm/lit water  Bavistin Fungicide Carbendazim 50% WP  Foliar: 0.5 ml/lit water  Ergon Fungicide Ergon 44.3% SC  Foliar: 0.6 ml/lit water    Anthracnose of Cotton: Symptom of anthracnose on cotton boll Scientific name of causal agent: Colletotrichum gossypii  Stage of occurrence: All growth stages  Anthracnose of Cotton Symptoms:  This disease affects all parts of the cotton plant  Small reddish circular spots appear on the cotyledon and primary leaves of seedlings  Causes seedlings to wilt and dry  In affected mature plants, stem splitting and shredding of bark can be seen  “Boll spotting” is the most cotton symptom  Sunken, circular, reddish-brown spots appear on the bolls and the infected boll stops to grow, burst and dry up.   Favourable conditions for Anthracnose infection in cotton:  Prolonged rainfall during the boll formation stage, presence of crop debris, weed hosts and close planting may be favourable for anthracnose infection in cotton.  Management of Anthracnose in cotton:  Product name  Technical content  Dosage (per lit water)  Biological Management  Terra Fungikill Herbal formulation    2 ml/lit water  Sonkul Sun Bio Monus Pseudomonas fluorescens  5 ml/lit water  Chemical Management  Borogold Fungicide Combination of Nano Silver Particles & Peroxy Acid  Spraying; 1.5 gm/lit water  Turf fungicide Carbendazim 12 % + Mancozeb 63 % WP  Drenching/Spraying: 1.8 – 2.5 gm/lit water  Taqat Fungicide Hexaconazole 5% + Captan 70% WP  Drenching: 2 gm/lit water  Splash Fungicide Chlorothalonil 75% WP    Spray: 2 ml/lit water  Dhanustin Fungicide Carbendazim 50% WP  Drenching/Spraying: 0.5 – 0.8 gm/lit water    Alternaria leaf blight of Cotton: Alternaria leaf blight on cotton Scientific name of causal agent: Alternaria macrospora  Stage of occurrence: Vegetative and Reproductive stage  Alternaria leaf blight of Cotton Symptoms:  Small, brown, irregular or round spots appear on the leaves  Central lesion of each spot may be surrounded by concentric rings  These spots coalesce together, and form blighted areas  Affected cotton leaves become brittle and fall  In case of severe infection, spots may appear on bracts and bolls.  Favourable conditions for Alternaria leaf blight infection in cotton:  High humidity, temperature of about 25 – 28°C, intermittent rainfall, wet foliage, dense planting and presence of crop residues due to lack of field sanitation create favourable conditions for Alternaria leaf blight infection in cotton.  Management of Alternaria leaf blight in cotton:  Method of Application of Chemicals – Spraying  Product name  Technical content  Dosage (per lit water)  Biological Management  Sanjeevni Bio fungicide Trichoderma Viride  Seed treatment: 8 – 10 gm/50 ml (per kg seed)  Soil drenching: 5 – 10 kg/lit  Ecomonas Bio Pesticide Pseudomonas fluorescens  Foliar: 8 – 10 ml/lit water  Chemical Management   Tilt fungicide Propiconazole 25 % EC  1 ml/lit water  Bavistin Fungicide Carbendazim 50% WP  0.5 ml/lit water  Avtar fungicide Zineb 68% + Hexaconazole 4%  1 gm/lit water  Amristar Top Fungicide Azoxystrobin 18.2% + Difenoconazole 11.4% SC  1 ml/lit water  Dithane M45 fungicide Mancozeb 75% WP  2 – 2.5 gm/lit water  Tata Ishaan Fungicide Chlorothalonil 75% WP  2.5 gm/lit water  Priaxor Fungicide Pyraclostrobin 333gm/ltr + Fluxapyroxad 167 gm/ltr SC  0.6 ml/lit water  Nativo Fungicide Tebuconazole + Trifloxystrobin 75 WG (50% +25% w/w)  0.2 – 0.5 gm/lit water    Bacterial blight of Cotton:  Scientific name of causal agent: Xanthomonas campestris pv.malvacearum  Stage of occurrence: Seedling to harvest  Bacterial blight of Cotton Symtoms: 5 common phases of symptoms are noticed.  Seedling blight: Water soaked, irregular or circular lesions appear on the cotyledons, which may spread to petiole and stem causing withering and death of seedlings  Angular leaf spot: Small, dark green, water-soaked lesions develop on the under surface of leaves and become angular when restricted by veinlets and veins. Later, the lesions turn to reddish brown colour and becomes visible on both sides of the leaf  Vein blight/Vein necrosis/Black vein: Blackening of veins and veinlets gives ‘blighting appearance’. The presence of bacterial oozes on the lower side of the leaf. Affected leaves show crinkling appearance, withering and are twisted inward.  Black arm: Black lesions are developed on stem and branches, causing premature drooping of leaves, cracking of stem and gummosis, leading to die back  Boll rot: Dark black, sunken and irregular spots appear on the bolls. It leads to premature bursting of bolls. The spread of bacterium inside the bolls causes yellow staining of lint.  Favourable conditions for Bacterial blight infection in cotton:  Optimum soil temperature of 28°C, relative humidity of 85%, early sowing, high atmospheric temperature of 30 – 40°C, delayed thinning, late irrigation, poor tillage, K-deficiency in soil and rains followed by bright sunshine are highly favourable parameters for bacterial blight infection.  Management of Bacterial blight in cotton:  Product name  Technical content  Dosage (per lit water)  Biological Management  Spot Bio Fungicide Pseudomonas fluorescens  10 ml/lit water  Biofix Kito Star Fatty acids and stabilizers  1 – 2 ml/lit water  V-Kure Eugenol, Thymol, potassium salts, cationic surface agent, sodium salts & preservatives  1.5 – 2 gm/lit water  Chemical Management  Turf fungicide Carbendazim 12 % + Mancozeb 63 % WP  Foliar: 1.8 – 2.5 gm/lit water  Vitavax powder 75% Fungicide Carboxin 37.5% + Thiram 37.5% DS  Seed treatment: 3 gm/kg seed  Dithane M45 fungicide Mancozeb 75% WP  Spraying: 2 – 2.5 gm/lit water  Avtar Fungicide  Zineb 68% + Hexaconazole 4% WP  Foliar: 1 gm/lit water    Sudden Wilt or Para Wilt of Cotton: Exact cause of this physiological disorder is still unknown  Stage of occurrence: Flowering and fruit filling stage  Sudden wilt disease or Para Wilt of Cotton Symptoms:  Premature death of top leaves, followed by collapse of the plant  Within few hours of heavy rainfall or soil saturation, wilting of leaves can be seen  If sunshine is brighter and hot, leaves may immediately dry  Wilted plants shed all the leaves and are left only with small immature fruits  Under cloudy weather, leaves turn yellow and die with no or little wilting  Favourable conditions for Para wilt infection in cotton:  Excessive water or sudden rainfall, poor soil drainage, bright sunshine or hot air temperature may create conditions favourable for para wilt incidence  Management of Para wilt or Sudden wilt in cotton:   The exact cause of this disorder is still unknown. Preventive measures can be taken to minimize the para wilt incidence to some extent. Some of the measures include growing wilt tolerant varieties, accurate management of irrigation, reducing waterlogging conditions by providing adequate drainage and maintaining optimum vegetative growth by avoid using excessive of FYM and fertilizers.  Leaf curl disease of Cotton Scientific name of causal agent: Cotton leaf curl virus  Stage of occurrence: All stages  Vector: Whitefly  Leaf curl disease of Cotton Symptoms:  ‘Upward and downward curling’ of leaves and thickening of veins  Enation can be noticed on the underside of the leaves  In severe cases, all the leaves curl and the plant growth is retarded  Leads to reduced boll bearing capacity  Favourable conditions for Leaf curl virus infection in cotton:  Primary source of spread is Whitefly (Bemisia tabaci). Presence of alternate hosts like chilli, bhendi, tomato, warm temperature, late planting can be favourable for leaf curl virus infection.   Management of Leaf curl virus in cotton:  Spread of leaf curl virus disease can be managed by controlling the vector whitefly, which spreads the virus. The following chemicals can be used to control whitefly in cotton.  Product Name  Technical Content  Dosage (per lit water)  Mechanical Management  Tapas Yellow Sticky Trap 11 cm x 28 cm  4 – 6/acre  Biological Management  Amruth Alestra Liquid Verticillium lecanii  2 ml/lit water  T.Stanes Nimbecidine Azardiractin 300 PPM (EC formulation)  5 ml/lit water  Chemical Management  Lancer Gold Insecticide Acephate 50 % + Imidacloprid 1.8 % SP  0.4 ml/lit water   Pager Insecticide Diafenthi uron 50% WP  1.2 gm/lit water  Ulala Insecticide Flonicamid 50 WG  0.3 gm/lit water  Actara Insecticide Thiamethoxam 25 % WG  0.5 gm/lit water  Kaitaku Insecticide Acetamiprid 20 % SP  0.1 – 0.2 ml/lit    Tobacco streak virus in Cotton Tobacco streak virus in cotton Scientific name of causal agent: Tobacco streak virus  Stage of occurrence: All stages  Vector: Thrips (Thrips tabaci)  Tobacco streak virus in Cotton Symptoms:  Ring like purplish necrotic spots appear on the leaves  Chlorotic streaks develop on the leaves  Stunted growth   Favourable conditions for Tobacco streak virus infection in cotton:  Presence of weed hosts, high temperature (25 – 30°C), infected plant debris may create favourable conditions for tobacco streak virus disease spread in cotton crop.  Management of Tobacco streak virus in cotton:  Spread of Tobacco streak virus disease can be managed by controlling thrips, which spread the virus. The following chemicals can be used to control thrips in cotton.  Product name  Technical content  Dosage (per lit water)  Mechanical Management  Tapas Yellow Sticky Trap 22 cm x 28 cm  6 – 8/acre  Biological Management  Pesto Raze Bio-insecticide Botanical Extracts  2 ml/lit water  Control TRM Bio-pesticide Organic blend of botanical extracts    2 ml/lit water  Econeem Plus Azadiractin 10000 ppm  2 ml/lit water  Chemical Management  Summit Insecticide Spinetoram 11.7 % SC  0.5- 1ml/lit water  Admire Insecticide Imidacloprid 70% WG  0.3 gm/lit water  Karate Insecticide Lambdacyhalothrin 5% EC  1.5 ml/lit water  Nurelle D Insecticide Chlorpyriphos 50% + Cypermethrin 5% EC  2 ml/lit water  Katyayani Thioxam Thiamethoxam 25% WG  0.4 gm/lit water   Shinzen Plus Insecticide Fipronil 5 % SC  3 gm/lit water  Osheen Insecticide Dinotefuran 20 % SG  0.6 – 0.8 gm/lit water  Marshal Insecticide Carbosulfan 25% EC  2.5 ml/lit water    (Note: Refer to the product label to find the right time of Application and more details of the product)  Discover effective strategies in our guide to enhance your cotton crop’s health and yield. Click here to read Management Of Insect Pests In Cotton.
Image

Organic Control Measures to Manage Powdery Mildew in Tomato Crop

Mahalakshmi S

-

29 January 2024

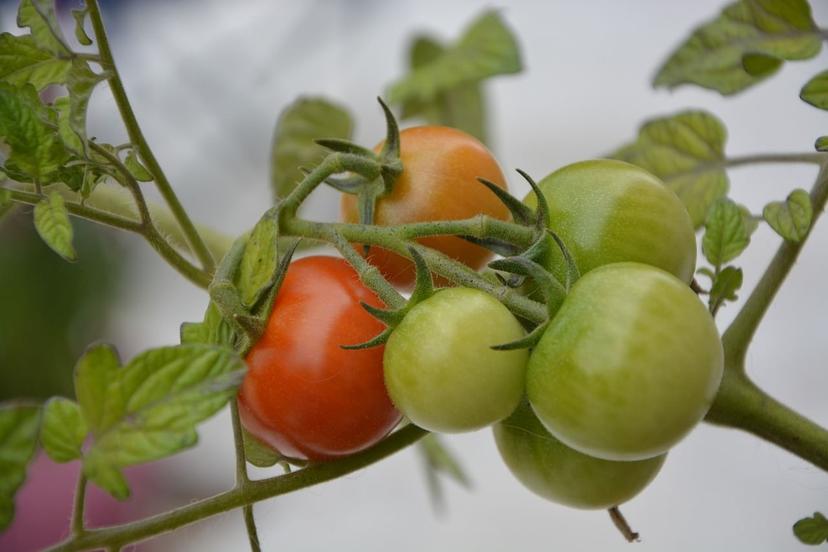
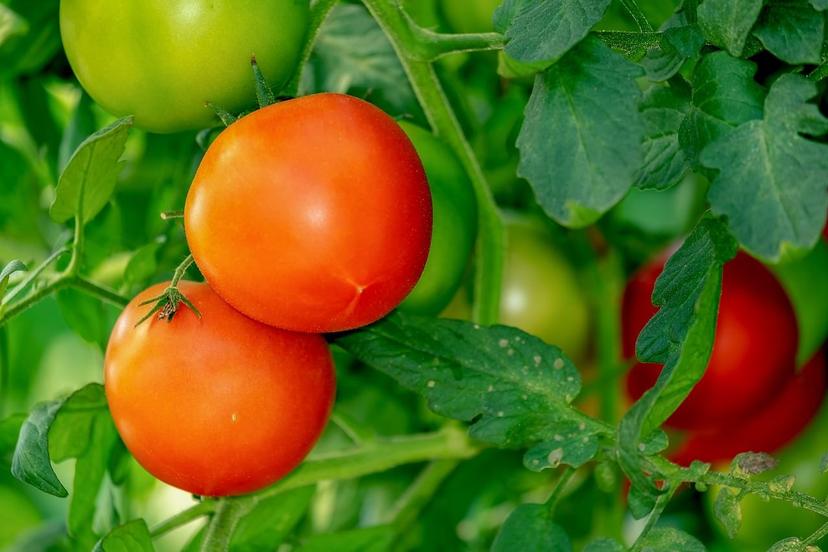
Tomato powdery mildew is a common fungal disease that affects tomato plants, especially in greenhouses and high tunnels. It reduces the photosynthetic activity and yield of the plants and that causes 10 to 90 percent yield losses in tomatoes. The disease is caused by different species of fungi, such as Oidium neolycopersicum, Leveillula taurica, and Erysiphe orontii. The disease was first reported in France in the 1840s, and later spread to other regions of the world.  Type of Infestation: Disease Common Name:  Powdery mildew Scientific Name: Leveillula taurica / Oidiopsis neolycopersici  Category of Plant Disease: Fungal disease Mode of Spread: Spores are easily dislodged from the infected leaves and carried long distances by wind and air currents Most Affected Plant Part: Leaf Environmental Factors Favorable for disease/pest development Temperature: Optimum temperature between the 60 to 80 °C range. Relative Humidity: optimum RH for disease development is above 90%  Most Affected States in India Maharashtra, Karnataka, Tamil Nadu, Kerala, and West Bengal Symptoms Initial Symptoms: Leaves of infected tomato plants show irregular, bright yellow blotches. Abundant white sporulation is seen on the upper surface of leaf and chlorotic spots on the corresponding lower surface.  Severe Symptoms: Severe disease leads  leaves to die, resulting in sunburn damage on fruit, reduced soluble solids, and weakened plants. Premature defoliation of leaves and complete death of plants at severe stage. Biological Control Measures for Powdery mildew  in Tomato Prophylactic Prophylactic Dosage/ Lit. of water Number of sprays Spray intervals Method of application Zymo Thymox +  Zymo Max Spread 1- 2 gm+0.10 ml 1-2 3 -5 weeks Foliar spray Curative Curative Dosage/ Lit. of water Number of treatment Spray intervals Method of application Zymo Biologique + Xymo Thymox +  Zymo Max Spread  2 gm+ 1-2 gm + 0.10 ml 2 -3 5 -7 days Foliar spray Nutrient :Merlyn Nutrix + Zymo Max Spread  0.25 ml + 0. 10 ml  2-3 5 -7 days Foliar spray Product Details Zymo Biologique: This product is available in powder form and contains organominerals, macronutrients, and stabilizers. Zymo Biologique is a broad spectrum organic mineral fungal control agent and improves soil fertility. Bio-organic extracts and natural minerals used in the formulation help to control plant fungus. Xymo Max Spread: This is available in liquid form, which is helpful for uniform spreading of biopesticide on sprayed areas. This can be used for all crops. It breaks down the surface tension of water and increases the wetting and spreading of a spray solution. Xymo BLT100: This is available in powder form and it contains NON-GMO biologicals, lysing biocatalysts, stabilizers and bioenhancers. This is a broad spectrum bio-agents, which is recommended for Early blight, Late blight and Septoria leaf spot diseases of tomato. Merlyn Nutrix: This is a micronutrient. It Aids overall plant growth and development. And is available in liquid form.  Product has rich Mg ions to form chlorophyll, which is responsible for capturing light energy during photosynthesis. Merlyn Nutrix enhances plant growth and metabolism. Merlyn Nutrix is applied against powdery mildew which improves the overall physiological response of the plant system  and reduces disease development.  For more details on the product, please visit page: :‘Diseases Management in Tomato Crop using UAL Organic Based Products’
Agri Hacks

Field Preparation

Land Preparation For Tomato Crop

Mahalakshmi S

-

06 July 2023

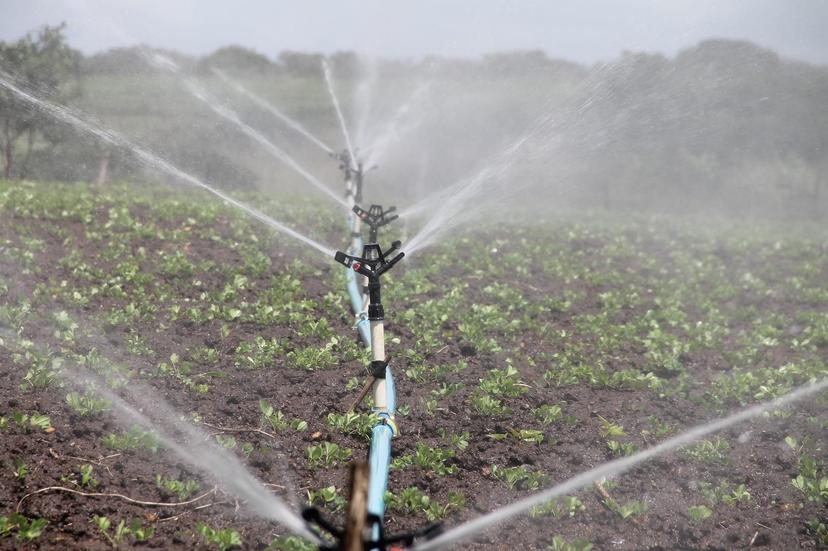
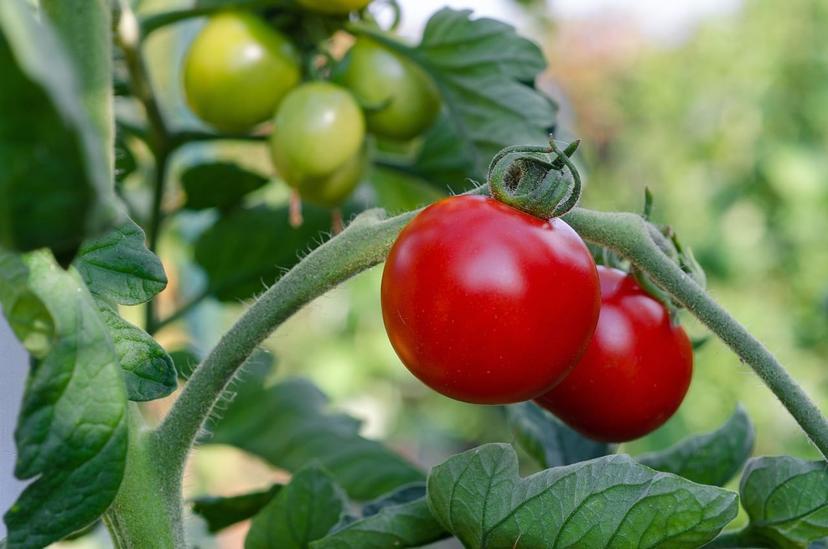
Are you planning to grow tomatoes? That’s fantastic! But before you dive into the exciting planting process, it’s important to ensure that your field is well-nourished and properly prepared.  In this article, we will be sharing some valuable insights on the best practices for making your field ready for a successful tomato crop. So, let’s get started!  Best Practices for Preparing Your Field for Tomato Cultivation Tilling or Ploughing The first step in preparing your field is tilling the land, also known as ploughing, which involves cutting, breaking, and inverting the soil. Tilling mechanically loosens and breaks up the soil and also helps in creating an optimal environment for seed germination and root growth. This process enhances air and water flow to the plant roots, thereby promoting healthy development.   Tilling the land also ensures that the minerals present in the soil are well-mixed and easily accessible to the crops, further enhancing their growth. This step sets a strong foundation for your tomato cultivation.  Note: While tilling is crucial, make sure that you are not over-tilling the soil, as excessive tilling can lead to the loss of soil structure and fertility, erosion, and damage to beneficial soil microorganisms. Striking a balance between loosening the soil for planting and maintaining its overall structure and health is essential.  Harrowing The next step after tilling is harrowing, which smoothens and pulverizes the soil to a shallow depth. It helps create a finer seedbed and prepares the soil for subsequent operations.  Harrowing is followed by the application of Farmyard Manure (FYM). FYM supplies nutrients and enhances the solubility and availability of nutrients in the soil. It also boosts microbial activity, further enriching the soil.  Recommended dose of FYM: 12 tons of FYM/acre   Making Ridges and Furrows The last step in tilling involves making ridges and furrows. These make intercultural operations easier throughout the growth cycle.   Recommended spacing for ridges and furrows: 60-75 cm. This specific spacing helps prevent the spread of pests and diseases, ensuring the overall health of your tomato plants.  Application of Biofertilizers and Bioagents To further enhance soil health and protect against pests and diseases, consider using beneficial microorganisms.                                                                                                             Recommended beneficial microorganisms: Trichoderma, Pseudomonas, and Paceliomyces.  These beneficial microorganisms can be mixed with neem cake, Pongamia cake, and FYM for improved results.  Application method: Broadcast the basal dose 7 to 10 days after applying biofertilizer.   Setting up the Irrigation-Drip System Additionally, for improved irrigation and water use efficiency in your tomato field, it is recommended to lay down inline drip lateral pipes.  Recommended pipe specifications: Use pipes with a diameter of 12 or 16 mm.  Note: These pipes should be laid at a 2-feet distance throughout the field.  Conclusion Remember, a well-prepared land is crucial in tomato cultivation as it lays the foundation for a high-quality yield. Make sure to follow the best practices and essential steps listed in this article for optimal crop growth and a higher yield. 
Image

Field Preparation for Tomato

Rakshitha HR

-

06 February 2023

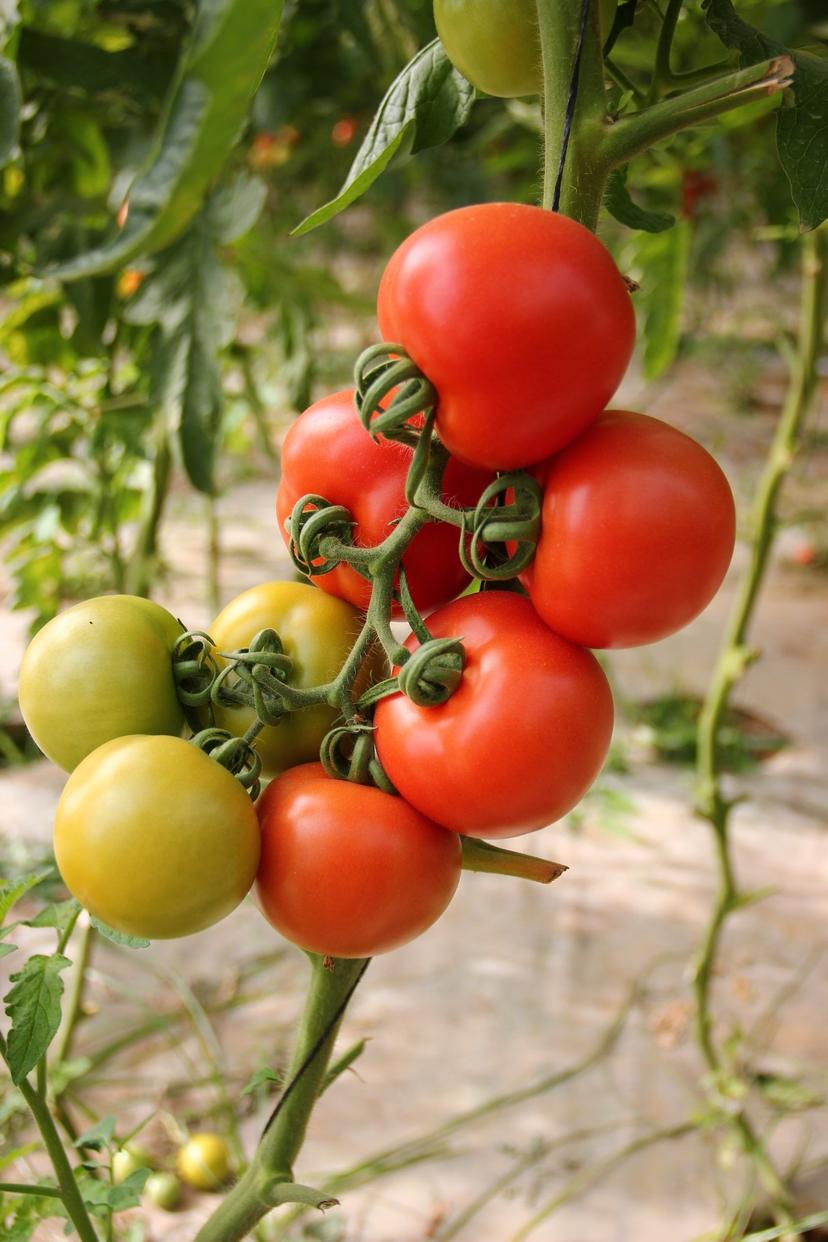
There are over 2000 varieties of tomatoes that are being cultivated in India. India is the second largest tomato producer. In the year 2021, India alone produced about 20.33 million tons. Tomato is not a vegetable, it is a fruit and is further classified as a berry. Tomato is a crop that can be grown anywhere without a farm i.e on a small piece of land adjacent to your house. It is one of the most popular gardening crops. Tomato is also a crop for value addition, like ketchup, jam, pickle, and sun drying.  Difficulty Level: Easy  Selection of Seeds As mentioned before, Tomato planting has over 1000 varieties to choose from. Some of the popular varieties are Vaishali, Rupali, Rashmi, Rajni, Pusa Ruby, Pusa Early Dwarf, Pusa 120, Co 1, Sioux, Best of All, Marglobe, Roma, Punjab Chuhra, Arka Vikas, Arka Saurabh, Arka Meghali, Amish Paste, Baylor Paste, Bulgarian Triumph, Carol Chyko’s Big Paste, Grandma Mary’s, Bellstar, Big Red Paste, Canadian Long Red, Denali, Hungarian Italian, Oroma, Palestinian, Peasant, Polish Paste, Red Sausage, Roma, San Marzano.  Tomato seed treatment Tomato seed treatment is essential for good germination and good yield. Tomato seed treatment with Trichoderma viride 4 g/kg of seeds or Carbendazim 2 g/kg of seeds, 24 hours before sowing is proven effective.  Nursery Bed Preparation for Tomato A nursery of 3 cents area is sufficient to produce enough seedlings for the one-hectare farm. Cover half of the nursery using 50% shade ned and cover the side of the nursery with an insect-proofed net. Form raised beds of 1 m width and convenient length and place HDPV pipes at 2m intervals for further protection with polythene sheets during rainy months. For the soil mixture for the raised bed mix sterilised coco peat at 300 kg with 5 kg neem cake along with Azospirillum and 1kg of Phosphobacteria. Conventionally cocopeat is used as portray filling. Depending on the region and the soil fertility the number of tomato saplings varies. In the south, for example, there are over 20,000 seedlings used per hectare, which requires 238 portrays (98 cells) with a spacing requirement of 90 x 60 x 60 cm in paired row system. In the north, however, the conventional practice is to plant much fewer saplings, around 10,000 per hectare. This requires 119 portrays (98 cells).  Sow one treated seed per cell in the protrays. Cover the seeds with cocopeat, and stack the trays above each other and cover it with a polythene sheet till germination. After six days, once the germination starts, place the germinated ones separately on the raised bed inside the shade net. Water with rosecan every day and drench with NPK 19:19:19 at  0.5% (5 gm/lit water) 18 days after sowing.  Land Preparations for Tomatoes Plough the land to a fine tilth. Apply 25 t/ha of FYM as basal manure during the last ploughing and form ridges and furrows at 60 cm spacing. This proceeds by the application of 2 kg/ha of Azospirillum and 2 kg/ha of Phosphobacteria by mixing with 50 kg of FYM. The fields are advised to be lined with drip lines for better irrigation. This way the water requirement can be regulated. Five days before planting the crop, spray of Pendimethalin 1.0 kg a.i./ha (or) Fluchloralin 1.0 kg a.i/ha as pre-emergence herbicide is advised although not mandated. Then transplant the 28-day-old plants. Fill the gaps that have been left on the 7th day after transplanting.  Soil Type Requirements for tomato Tomato crop requires good soil that is rich in organic matter. Loamy soil with a neutral pH range of 6.5 – 7.5 is ideal.  Conclusion Tomato cultivation is practised all throughout India. It is one of the hardest crops and requires less maintenance.   FAQs Suggest some popular varieties of tomato?  States  Varieties/Hybrids  Tamil Nadu  Saaho tomato seeds (To 3251), Lakshmi tomato, Abhilash tomato, Heemsohna tomato, Polyana tomato  Andhra Pradesh  Saaho tomato seeds (To 3251), Abhilash tomato seeds, Heemshikhar tomato, US 440 tomato, Sikinder tomato  Telangana  Saaho tomato seeds (To 3251), Abhilash tomato seeds, US 440 tomato, Heemsohna tomato, SW 1508 hybrid round tomato  Karnataka  Saaho tomato seeds (To 3251), Heemsohna tomato, Abhilash tomato seeds, US 440 tomato, US 800 tomato, Heemshikhar tomato  Madhya Pradesh  Saaho tomato seeds (To 3251), Abhilash tomato seeds, NS 4266 tomato, Heemshikhar tomato, Heemsohna tomato, To-3150 tomato    2. How is seed treatment done for tomato? Treat the tomato seeds with BACTVIPE (Pseudomonas fluorescens) bio-fungicide at 5-10 ml/kg seed in 50 ml of water or SANJEEVNI (Trichoderma viride) bio-fungicide at 8 – 10 gm/kg seed in 50 ml water. Then shade dry the seeds 20 – 30 minutes before sowing.  How is the soil mixture prepared for tomato nursery protrays required for an acre main field? The soil mixture for protrays is prepared by mixing 121 kg of sterilized Sterling Neopeat Bale (Cocopeat) with 2 kg neem cake along with Biofertilizers like Azospirillum (Pioneer Agro) and Phosphobacteria (Pioneer Agro) each at 4 kg/acre.   (Note: Change the biofertilizer recommendation as per your nursery area)  4. What is the general dose of fertilizer recommendation for tomato? The fertilizer recommendation dose for tomato varieties is 60:40:20 kg/acre and hybrid is 81:101:101 kg/acre. The commercial quantity for field application is listed in the table below:   Nutrient  Fertilizer   Varieties (per acre)  Hybrid (per acre)  Organic  FYM  10 ton  10 ton  N  Urea or  130 kg  176 kg  Ammonium Sulphate  293 kg  395 kg  P  Single Super Phosphate (SSP) or  250 kg  631 kg  Double Super Phosphate (DSP)   125 kg  316 kg  K  Muriate of Potash (MOP)  33 kg  169 kg  Sulphate of Potash (SOP)  40 kg  202 kg  Zn  (For Zn deficient soil)   ANSHUL ZINC EDTA-FS (ZN 12%) micronutrient  Foliar application: 0.5 – 1 gm/lit water   Soil application:10 kg  Foliar application: 0.5 – 1 gm/lit water  Soil application:10 kg  B (For B deficient soil)  ALLBOR Boron 20%  Foliar spray: 1 gm/lit water  Foliar spray: 1 gm/lit water      5. What is the ideal season for sowing tomatoes? May – June and November – December is the ideal season for tomato cultivation.  6. What pre-emergence herbicide can be used to control weeds in tomato field? Spray pre-emergence herbicide BACF PLOD (30% EC Pendimethalin) at 1000 ml/acre. Note: The information contained herein is for informational purposes only. Nothing herein shall be construed to be financial or legal advice. Pesticides are a considerable risk of loss in crops and viewers are advised to do their own research before making any decisions.   

State Schemes

Might Interest You

INDIA’S LARGEST AGRICULTURE PLATFORM

400+

Brands

30M+

Farmers Served

9K+

Products

95%+

Pincodes Served