Few garden pests are as frustrating as cutworms. One morning your seedlings look healthy and upright, and by the next, they’re lying on the soil surface as if they’ve been cleanly clipped at the base. For growers of vegetables, ornamentals, and field crops, cutworm control in seedlings and young crops is essential for preventing stand loss and protecting early plant growth.
Cutworms are especially damaging because they attack when plants are most vulnerable. The good news is that with early scouting, smart cultural practices, and timely treatment, you can greatly reduce their impact. This guide explains how to identify cutworm damage, stop infestations before they spread, and protect seedlings from repeated attacks.
What Are Cutworms?
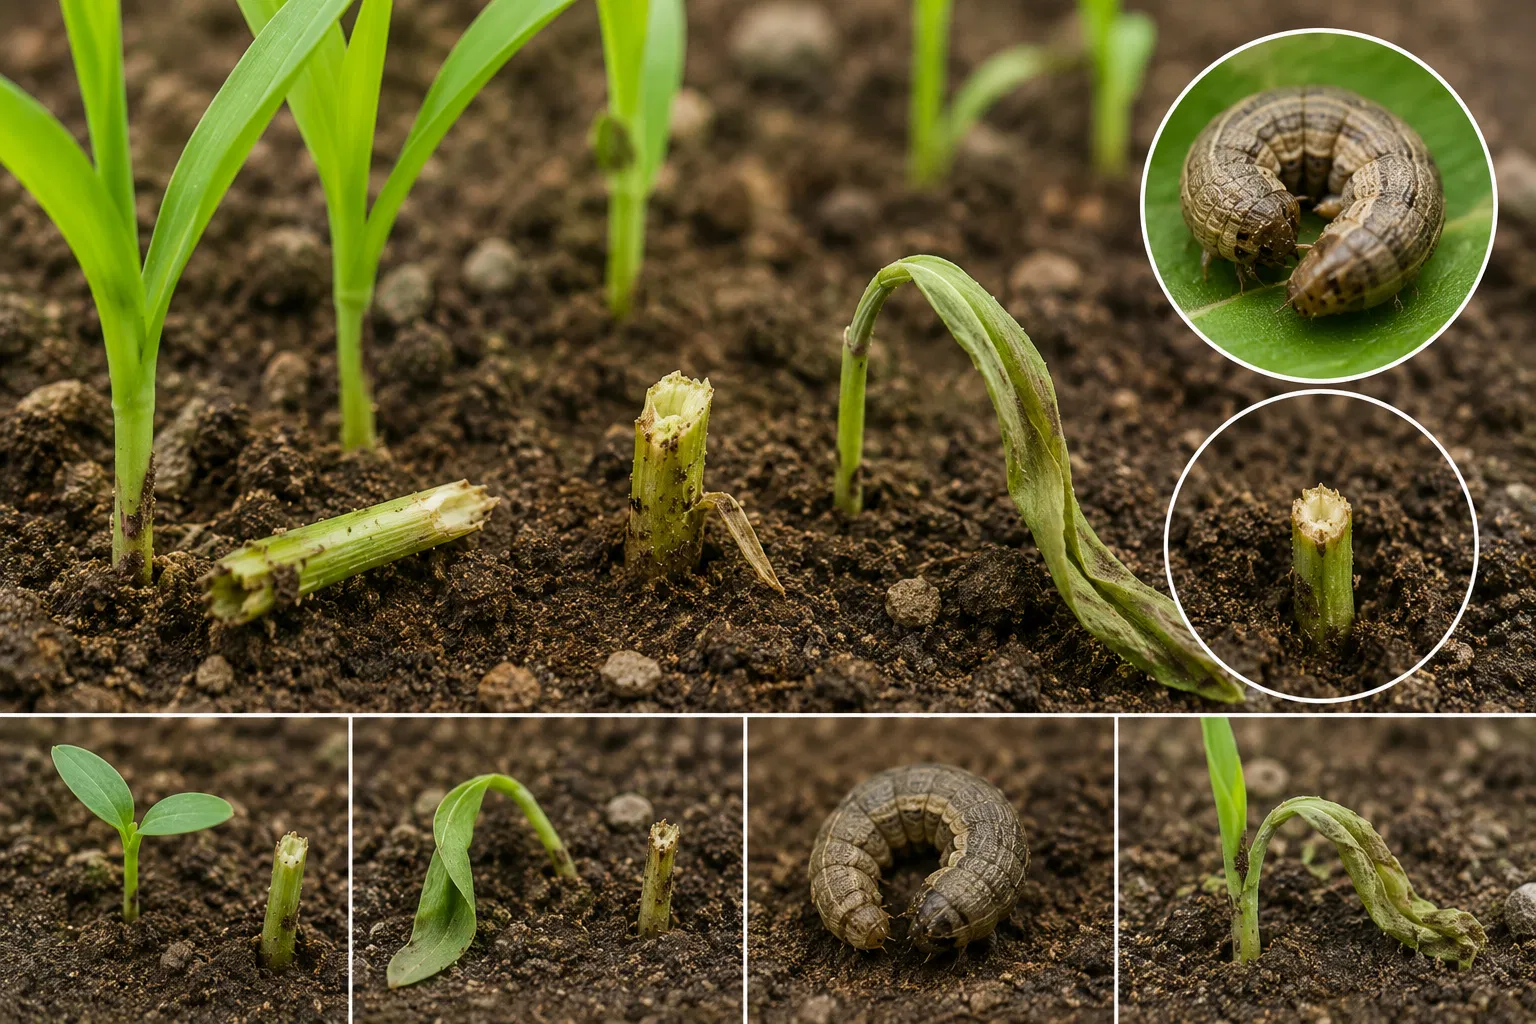
Cutworms are the larval stage of several moth species in the Noctuidae family. These caterpillars typically hide in the soil during the day and feed at night, making them difficult to spot until damage appears. Most species are gray, brown, or greenish and curl into a tight “C” shape when disturbed.
They are notorious for cutting off young seedlings at or just below the soil line, which is where the name “cutworm” comes from. Depending on the species, they may also chew leaves, stems, and tender growth on low-growing crops.
Why Cutworms Target Seedlings and Young Crops
Seedlings and young crops are tender, low to the ground, and easy for cutworms to reach. At this stage, stems are soft and vulnerable, and the plant often cannot recover if the stem is severed. Even a small population can cause significant losses in newly planted rows.
Cutworm problems are often worse in fields or gardens with:
- Heavy weed pressure before planting
- Residue from previous crops
- Moist, sheltered soil conditions
- Late spring or early summer planting
- High levels of moth activity nearby
How to Identify Cutworm Damage
Recognizing cutworm injury early is the first step in successful control. Since these pests feed at night, the damage may appear without the pest being visible.
Common signs of cutworm infestation
- Seedlings cut off at the soil line
- Partially severed stems lying on the ground
- Irregular holes in leaves or stems
- Missing plants in rows or patches
- Soil disturbance or curled caterpillars nearby during evening inspection
In many cases, the most obvious symptom is a plant that has been “mowed down” overnight. If damage appears in clusters, cutworms are a likely culprit.
Best Strategies for Cutworm Control in Seedlings and Young Crops
Effective cutworm management works best when several strategies are combined. Relying on one method alone is often not enough, especially during peak pressure.
1. Start with field and garden sanitation
Cutworms often lay eggs in weedy or residue-heavy areas. Reducing attractive habitat before planting can lower infestation pressure.
- Remove weeds at least two weeks before planting
- Incorporate crop residues when appropriate
- Keep field edges and borders clean
- Avoid planting directly into heavy surface debris when possible
Sanitation is one of the simplest and most effective preventive measures for cutworm control.
2. Use tillage or soil disturbance strategically
Light tillage can expose cutworm larvae and pupae to predators, drying conditions, and birds. While not always practical in no-till systems, soil disturbance before planting can reduce the number of pests surviving in the area.
Important: Tillage works best as part of an integrated program and should be timed carefully to avoid worsening weed pressure later.
3. Monitor crops closely after emergence
Scouting is critical during the first few weeks after planting. Since cutworms feed at night, inspect fields in the evening or early morning.
- Check 10 to 20 plants in multiple locations
- Look for chewed stems and missing seedlings
- Dig lightly around damaged plants to find larvae in the topsoil
- Use a flashlight at night to spot active feeding
Early detection allows for faster intervention before damage spreads across the entire planting.
4. Use physical barriers on small plantings
For home gardens, nurseries, and high-value transplants, barriers can provide excellent protection. These methods keep cutworms from reaching tender stems.
- Collars made from cardboard, aluminum foil, or plastic around each stem
- Row covers to exclude adult moths from laying eggs
- Raised seedlings transplanted slightly deeper for added stem protection
Collars should extend a couple of inches above and below the soil surface. Be sure they fit snugly enough to block larvae without harming the plant.
5. Encourage natural enemies
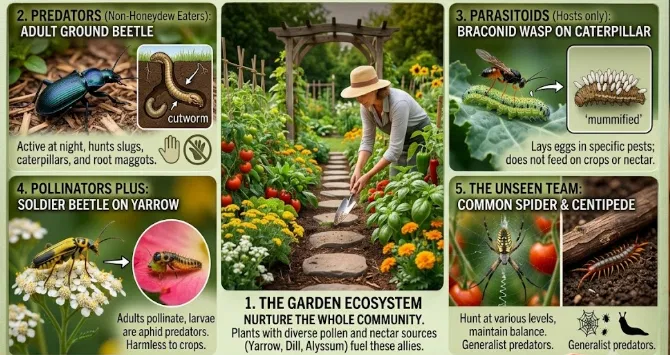
Beneficial organisms can help suppress cutworm populations over time. Ground beetles, parasitic wasps, birds, and certain predatory insects all contribute to biological control.
To support natural enemies:
- Avoid broad-spectrum insecticide use unless necessary
- Maintain habitat diversity around crops
- Limit unnecessary disturbance during peak beneficial activity
Biological control won’t eliminate cutworms overnight, but it helps build long-term resilience in the cropping system.
6. Apply insecticides only when scouting justifies it
When cutworm pressure is high and damage is active, insecticide use may be necessary. Treatment is most effective when larvae are small and feeding near the soil surface.
Choose products labeled for cutworms on your crop, and follow all application directions carefully. Timing matters: spraying too late may not prevent stand loss. Targeting young larvae offers the best results.
Tip: Always match control methods to crop type, growth stage, and local pest pressure. An integrated approach is usually more effective than a single treatment.
How to Prevent Cutworm Problems Before Planting
Prevention is the foundation of successful cutworm management. Once seedlings are cut down, the damage is already done. Planning ahead can save time, labor, and replanting costs.
Pre-plant prevention checklist
- Remove weeds and plant debris from the area
- Prepare the soil to reduce hiding places
- Inspect nearby field margins for moth activity and host weeds
- Time planting to avoid peak moth laying periods when possible
- Use transplants or larger seedlings for added resilience
- Install row covers or collars before cutworm pressure begins
These steps can dramatically reduce the risk of early crop losses, especially in vulnerable vegetables and transplanted crops.
Crops Most Commonly Affected by Cutworms
Cutworms feed on a wide range of plants, but young crops are the most at risk. Commonly affected crops include:
Any newly emerged crop with soft stems can be a target, especially when weeds and crop residue are present nearby.
When to Take Action
Act quickly if you notice cut plants, fresh chewing, or larvae near the soil surface. Waiting even a few days can allow cutworms to destroy a large percentage of seedlings in a planting.
The best time to respond is when:
- Damage is first observed
- Larvae are small and active
- Seedlings are still at a vulnerable stage
- Scouting shows increasing pressure in multiple areas
Fast action is especially important after rain or irrigation, since moist soil conditions often increase cutworm activity.
Conclusion
Cutworm control in seedlings and young crops depends on vigilance, prevention, and timely intervention. By cleaning up weeds, monitoring closely, using barriers where practical, and responding quickly to early damage, you can protect young plants before losses become severe.
If you want healthier stands and fewer replanting headaches, make cutworm management part of your routine from the start. The earlier you act, the better your chances of keeping seedlings safe and productive.