If you want healthier plants, lower water bills, and less time spent hauling a hose around the yard, a drip irrigation system is one of the smartest upgrades you can make. Drip irrigation delivers water slowly and directly to the root zone, helping plants get exactly what they need without waste. Whether you’re watering garden beds, shrubs, or a small vegetable patch, setting up a drip irrigation system is easier than you might think.
In this step-by-step guide, you’ll learn how to plan, install, and test a drip irrigation system so you can water more efficiently and keep your landscape thriving.
What Is a Drip Irrigation System?
A drip irrigation system is a low-pressure watering method that sends water through tubing and emits it slowly through drip emitters, soaker lines, or micro-sprayers. Instead of spraying water over a wide area, it delivers moisture right where plants need it most.
Benefits of drip irrigation include:
- Reduced water waste
- Healthier plant roots
- Less evaporation and runoff
- Fewer weeds in planting beds
- More consistent watering
Step 1: Plan Your Drip Irrigation Layout
Before buying parts, walk through your garden and identify what you want to water. Group plants by water needs whenever possible. Vegetables, flowers, shrubs, and trees may all require different emitter types or flow rates.
Start by sketching a simple map of the area. Mark:
- Water source location
- Garden beds, containers, shrubs, and trees
- Plant spacing
- Slopes or uneven areas
- Existing obstacles like pathways, fences, or patios
This plan helps you determine how much tubing, how many fittings, and what kind of emitters you’ll need.
Step 2: Gather the Right Materials
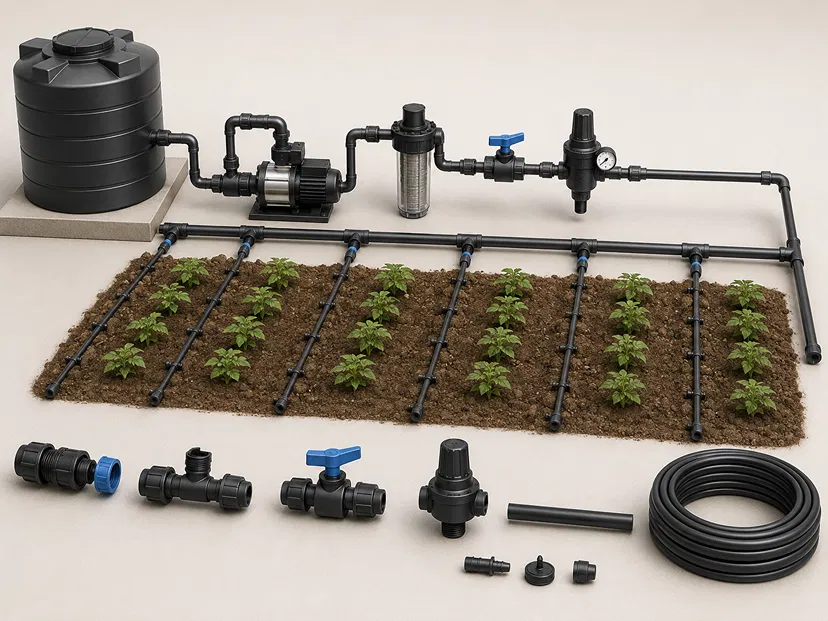
Once your layout is ready, collect the parts for the system. Most drip irrigation kits and custom setups use a similar set of components.
Common drip irrigation supplies:
- Backflow preventer
- Filter
- Pressure regulator
- ½-inch main tubing or drip line
- ¼-inch distribution tubing
- Drip emitters, soaker hoses, or micro-sprayers
- Connectors, tees, elbows, and end caps
- Stake holders or tubing stakes
- Hole punch tool
- Timer, optional but highly recommended
Tip: Use a pressure regulator and filter to protect the system. Drip irrigation works best at low pressure and can clog easily without filtration.
Step 3: Install the Backflow Preventer, Filter, and Pressure Regulator
Start at the water source. Attach the backflow preventer first if required in your area. This helps prevent irrigation water from flowing back into your household water supply. Next, attach the filter and then the pressure regulator.
This setup keeps your system safer, cleaner, and more reliable. If you’re using a hose bib connection, these parts usually screw directly onto the spigot in this order.
A clean, properly regulated water source is the foundation of a long-lasting drip irrigation system.
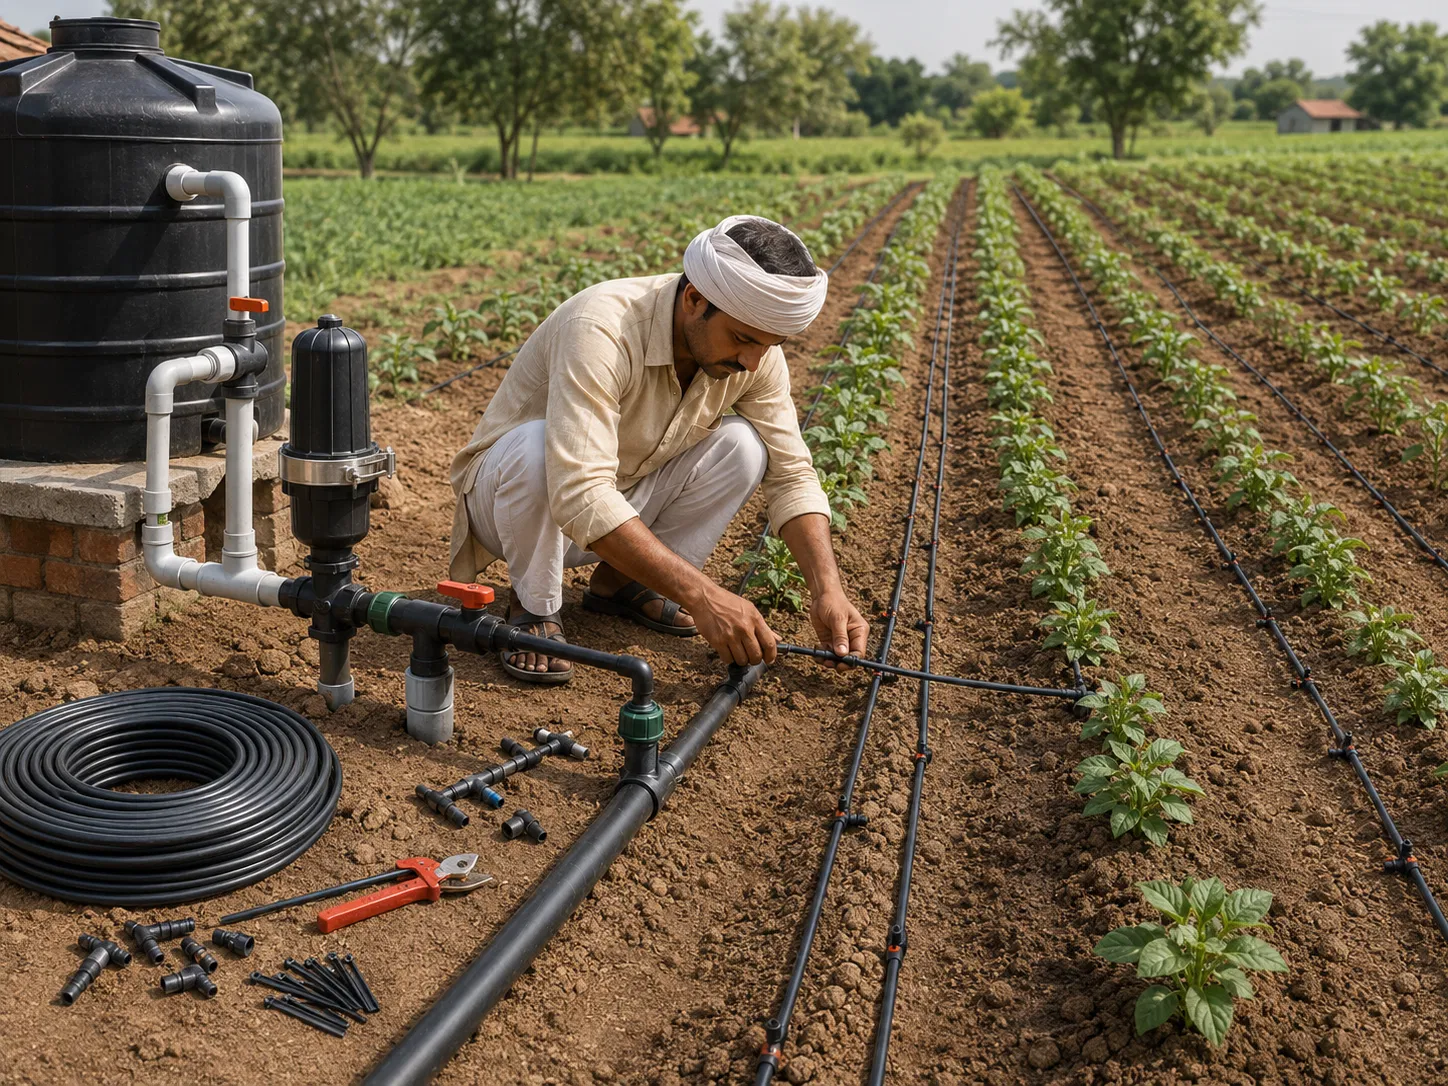
Step 4: Lay Out the Main Tubing
Run the ½-inch main tubing along the edge of the area you want to water. Try to keep the tubing close to plant rows or bed edges for easier installation. If your garden is large or has multiple sections, you may need to create zones.
Before cutting anything, lay the tubing loosely in place and check that it reaches all target areas. Avoid sharp bends and unnecessary stretching. Use tubing stakes to hold it in position as needed.
If the tubing needs to change direction or split into more than one line, use tees and elbows to create the layout.
Step 5: Add Drip Emitters or Drip Lines
Now it’s time to deliver water to the plants. Depending on your setup, you can use individual emitters, inline drip tubing, or soaker hose-style lines.
Choosing the right watering method:
- Individual emitters: Best for potted plants, shrubs, and trees
- Drip line: Great for rows of vegetables or closely spaced plants
- Soaker hose: Useful for dense planting beds
- Micro-sprayers: Helpful for ground cover or wider root zones
Use a hole punch to create openings in the main tubing, then insert barbed connectors and attach ¼-inch tubing or emitters. Place emitters near the root zone, not directly against the plant stem.
General emitter placement guide:
- Small plants: 1 emitter
- Medium shrubs: 2 emitters
- Large shrubs or young trees: 3 or more emitters spaced around the root zone
Step 6: Secure the Tubing and Check Coverage
After all emitters and lines are in place, secure the tubing with stakes so it stays put. Make sure the tubing lies flat and doesn’t twist or kink. Then inspect the entire system to confirm that every plant you want to water is covered.
Look for areas that might be under-watered or over-watered. Adjust emitter placement if needed before turning the water on for a full test.
Step 7: Flush the System Before Finalizing
Before sealing the ends, flush the system to remove dirt, plastic shavings, or debris from the tubing. Remove the end caps and briefly turn on the water so any particles can wash out. This simple step helps prevent clogs later.
Once the water runs clear, shut the system off and reinstall the end caps securely.
Step 8: Test the Drip Irrigation System
Turn the water on and inspect the system carefully. Walk the entire line and check each emitter, connector, and joint for leaks or weak flow. Watch how long it takes for water to reach each plant and whether the distribution looks even.
During testing, check for:
- Leaks at fittings
- Clogged emitters
- Uneven water pressure
- Puddling around plants
- Dry spots in the layout
If you find a problem, fix it immediately. A small adjustment now can save a lot of frustration later.
Step 9: Add a Timer for Automation
A timer makes drip irrigation even more convenient. Instead of remembering to water manually, you can schedule watering early in the morning or at another consistent time. This helps reduce evaporation and gives plants steady moisture.
Choose a timer that works with your water source and system flow rate. Set the schedule based on plant type, weather, and season. In hot weather, you may need to water more often. During cooler months, reduce the frequency.
Step 10: Maintain the System Regularly
Drip irrigation systems are low-maintenance, but they still need occasional care. Check the filter regularly and clean it when necessary. Inspect emitters for clogs and tubing for cracks or damage. If you notice weak flow, the issue is often a dirty filter or blocked emitter.
Simple maintenance habits include:
- Checking the system monthly
- Cleaning the filter as needed
- Flushing lines periodically
- Replacing damaged tubing or emitters
- Adjusting watering schedules by season
Helpful Tips for Better Results
To get the most from your drip irrigation system, keep these best practices in mind:
- Water early in the morning for best absorption
- Use mulch to help retain soil moisture
- Match emitter output to plant size and water demand
- Keep fittings accessible for future adjustments
- Recheck the system after heavy rain or landscaping changes
Conclusion
Learning how to set up a drip irrigation system step by step is a practical way to save water, simplify garden care, and give your plants more consistent moisture. With a good plan, the right parts, and a careful installation, you can build a system that works efficiently season after season.
Start small if needed, test thoroughly, and adjust as your garden grows. Once your drip irrigation system is running, you’ll enjoy healthier plants and less time spent watering by hand. If you’re ready to upgrade your garden care, this is one project that delivers real results.