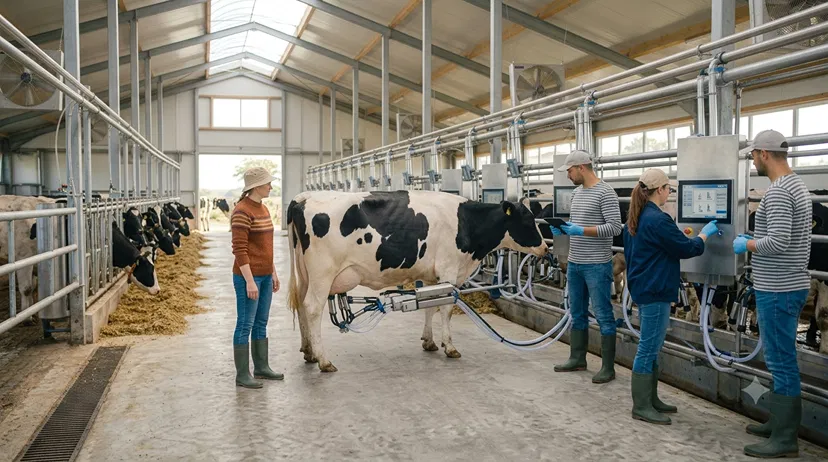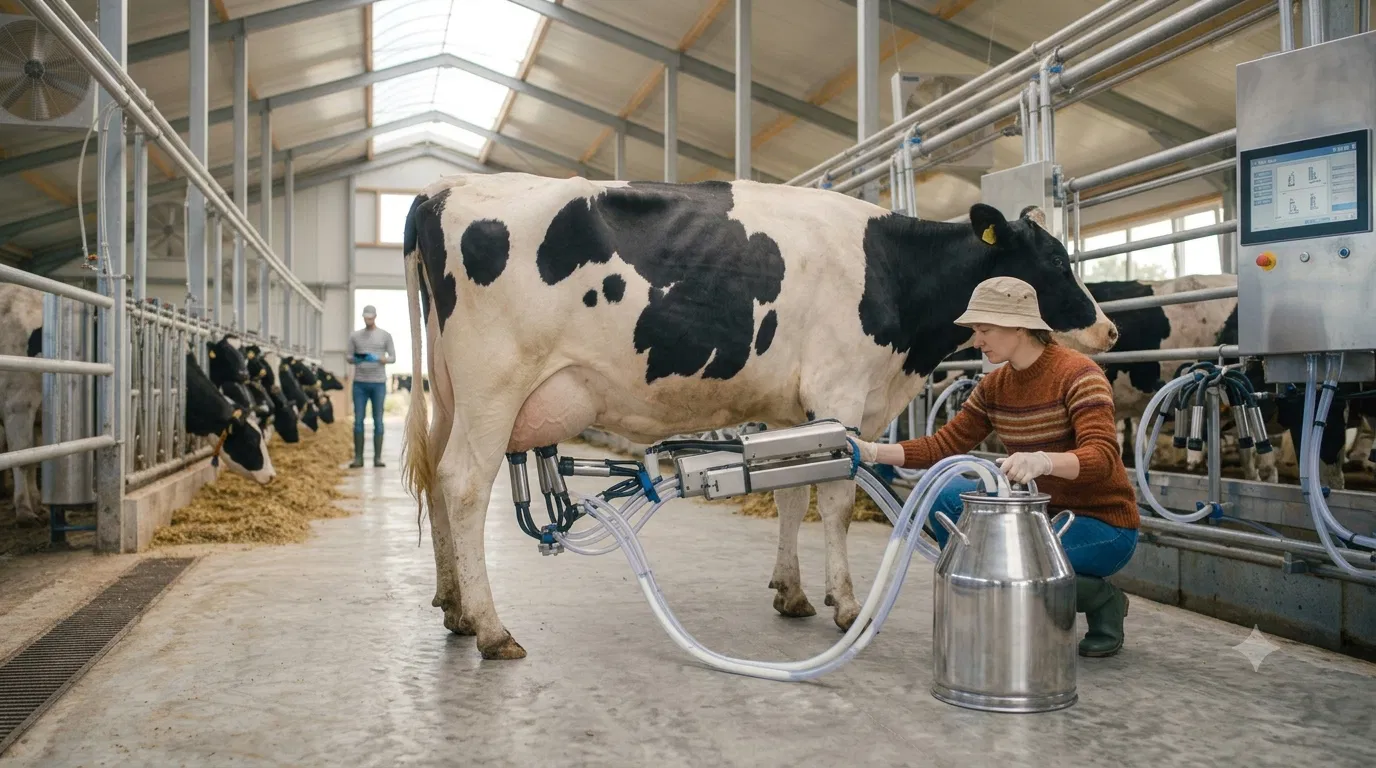
Modern dairy farming depends on efficiency, hygiene, and consistency, and few tools are as important as the milking apparatus. Whether used on a small farm or in a large commercial dairy, a milking machine is designed to gently and efficiently extract milk while protecting the animal’s comfort and the quality of the product. Understanding how a milking apparatus works helps farmers, dairy workers, and curious readers appreciate the engineering behind every milking session.
In this guide, we’ll break down the main parts of a milking apparatus, explain what each component does, and show how the system works together from start to finish.
What Is a Milking Apparatus?
A milking apparatus is a mechanical system used to remove milk from the udders of dairy animals such as cows, goats, and sheep. Instead of manual milking, the machine uses controlled vacuum pressure and pulsation to draw milk through teat cups and into a collection container. The process is designed to mimic the natural rhythm of hand milking while improving speed and cleanliness.
At its core, a milking apparatus helps farmers save time, reduce labor, and maintain more consistent milk production. It also minimizes direct contact, which can improve sanitation when used correctly.
Main Parts of a Milking Apparatus
Although designs vary, most milking systems include the same basic components. Each part has a specific role in the milking process.
1. Teat Cups
Teat cups are the most visible part of the machine. They are placed on the animal’s teats to create a secure seal. Each cup contains a soft liner that helps protect the teat from excessive pressure and provides a comfortable fit.
The teat cups are responsible for transferring the vacuum action that draws milk out of the teat canal. Good teat cup design is essential for animal comfort and effective milk flow.
2. Liners
Inside each teat cup is a liner, usually made of rubber or silicone. The liner opens and closes in response to the pulsation system, gently massaging the teat and allowing milk to flow.
Why liners matter:
- They reduce stress on the teat
- They help regulate milk extraction
- They contribute to hygiene and comfort
3. Shells
The shell is the rigid outer part of the teat cup that holds the liner in place. It provides structure and protects the liner during operation. The shell also helps maintain the vacuum needed for milking.
4. Vacuum Pump
The vacuum pump is the heart of the milking apparatus. It creates the negative pressure needed to move milk from the udder through the system. Without the vacuum pump, the machine cannot function.
This component must be carefully calibrated because too much vacuum can damage teats, while too little vacuum can reduce milk flow and efficiency.
5. Pulsator
The pulsator controls the alternating pressure inside the teat cups. It switches between vacuum and atmospheric pressure, creating a rhythmic squeeze-and-release motion that imitates a calf nursing.
This pulsation is important because it allows milk to flow during the vacuum phase while giving the teat a brief rest during the release phase. That balance helps reduce discomfort and supports udder health.
6. Milk Tubes and Air Tubes
Milk tubes carry milk from the teat cups to the collection chamber or milk pipeline. Air tubes supply the pulsation system with air to regulate pressure changes. Together, they keep the system moving smoothly and efficiently.
7. Milk Claw or Collector
Many milking systems use a milk claw, also called a collector, where milk from all four teat cups joins before traveling through the main milk line. This part helps organize flow and makes the apparatus easier to manage during milking.
8. Milk Pipeline or Collection Container
Once milk leaves the claw, it moves through a milk pipeline or into a collection container. In pipeline systems, milk travels directly to a bulk tank. In portable systems, it may be collected in a bucket or canister.
This stage is critical for keeping milk clean and preventing contamination before cooling and storage.
How a Milking Apparatus Works Step by Step
Now that the parts are clear, here’s how the full milking process works from beginning to end.
- Preparation: The udder and teats are cleaned to remove dirt and bacteria. This helps maintain milk hygiene and lowers the risk of infection.
- Attachment: The teat cups are positioned over each teat and gently attached using the vacuum system.
- Vacuum creation: The pump creates suction, pulling milk from the teat canals into the liners.
- Pulsation: The pulsator alternates pressure inside the cups, allowing milk flow while preventing constant pressure on the teats.
- Milk transfer: Milk moves through the tubes, into the claw, and then into the pipeline or collection container.
- Removal: When milk flow slows, the machine is removed carefully to avoid discomfort or injury.
- Cleaning: The system is thoroughly washed and sanitized before the next use.
Why Vacuum and Pulsation Are So Important
The success of a milking apparatus depends on the right balance between vacuum and pulsation. These two forces work together to make milking efficient and safe.
Vacuum removes the milk, while pulsation protects the teat.
If vacuum pressure is too high, it can cause teat irritation, swelling, or damage. If pulsation is poorly timed, milk flow may slow and the machine may become uncomfortable for the animal. That’s why proper maintenance and correct settings are essential in any milking system.
Benefits of Using a Milking Apparatus
A well-designed milking apparatus offers several advantages over manual milking. These benefits make it a standard tool in modern dairy operations.
- Faster milking: Large groups of animals can be milked more efficiently.
- Reduced labor: Less manual effort is needed from farm workers.
- Improved hygiene: Closed systems help reduce contamination.
- Consistent performance: The machine delivers a reliable milking routine.
- Better scalability: Ideal for farms with growing dairy production needs.
Common Maintenance Needs
To keep a milking apparatus working properly, routine maintenance is essential. A neglected machine can lead to poor milk quality, reduced efficiency, and discomfort for animals.
Key maintenance tasks include:
- Cleaning all milk-contact parts after every use
- Inspecting liners for cracks or wear
- Checking vacuum levels regularly
- Replacing damaged tubing or seals
- Ensuring the pulsator is functioning correctly
Regular maintenance not only extends the life of the equipment but also supports udder health and milk safety.
Signs a Milking Apparatus May Need Attention
Farmers should watch for signs that the milking apparatus is not operating properly. Common warning signs include:
- Uneven milk flow
- Slipping teat cups
- Excessive noise from the pump
- Teat irritation or swelling
- Reduced milk yield
These symptoms may point to vacuum issues, worn liners, poor fit, or cleaning problems. Addressing them quickly helps prevent larger problems later.
Final Thoughts
A milking apparatus is more than just a piece of farm equipment. It is a carefully engineered system that combines vacuum, pulsation, and smart design to make milk extraction efficient, clean, and animal-friendly. By understanding the parts and how they function together, dairy farmers can use the equipment more effectively and maintain better herd health.
If you want better milk quality, smoother operations, and a more reliable dairy routine, start with the basics: learn your milking apparatus, maintain it well, and use it with care. That’s how modern milking becomes both productive and responsible.